
Takeaway: The Flair PRO 2 is the most capable version of Flair’s original portable platform. It adds a stainless brew path, a larger 70 ml reservoir with up to 56 ml yield, a pressure gauge with a clear 6–9 bar “espresso zone,” and a bottomless portafilter with a removable spout. The kit includes a travel case and a full set of tools. It expects a real burr grinder and benefits from disciplined preheating, yet it rewards that care with sweet, dense espresso and consistent pressure profiling wherever you brew.
What It Is
The PRO 2 is a manual direct lever with no electronics. You provide hot water from a kettle, the grinder, and the technique. The brew head is all stainless steel, the portafilter is stainless with a copper-plated base, and the included gauge reads the pressure inside the brew chamber while you pull. Capacity increases over Flair’s small-format heads, which opens longer ratios and bigger doses without losing the compact footprint that defines the brand.
The package is intentionally complete. You get the base, post and lever, stainless brew cylinder and plunger, stainless portafilter with screen, a removable stainless spout, the gauge and stem, a dosing cup, funnel, two-piece metal drip tray, a stainless tamper, a preheat and tamping cap, and a fitted carrying case. This matters for value, because you can brew correctly on day one without shopping a bag of add-ons.
Where It Sits In Flair’s Line
The PRO 2 is the “big head” portable Flair. It offers more dose and water capacity than the Classic-size heads, and it keeps a compact, travel-friendly form unlike the 58 mm platform. The design target is simple. Give enthusiasts a stainless brew path, live pressure feedback, and enough room in the chamber to run modern espresso ratios, while keeping weight and volume low enough to pack.
Headline Specifications
- Brew head: Stainless cylinder and portafilter, copper-plated base
- Dose range: 16–24 g
- Input water capacity: 70 ml, up to ~56 ml yield
- Gauge: Analog, with 6–9 bar espresso zone for live feedback
- Assembled dimensions: 12.5 × 6.25 × 10 in (32 × 16 × 25.4 cm)
- Case dimensions: 12.5 × 9 × 3.25 in (32 × 23 × 8 cm)
- Weight: 7 lb (3.18 kg)
- In-the-box: base, post and lever, brew head, removable spout, gauge and stem, dosing cup, funnel, screen, metal tamper, two-piece drip tray, carry case, brew guide
Numbers and contents per the current product page and guides.
Two practical notes on capacity. Flair documents 70 ml in the reservoir and up to ~60 ml theoretical output for this head, with ~56 ml listed on the PRO 2 product page. That headroom is enough for a weight-based double at 1:2, and for longer shots when your coffee invites it. Volumetric doubles by café definitions exceed the head’s maximum volumetric output. The fix is to work by weight, which you should do for repeatability anyway.
Build, Materials, and Upgrades Over Earlier Pros
The PRO 2 introduced four key refinements: a redesigned bottomless portafilter for smoother flow, a removable stainless spout, a silicone grip on the lever for comfort, and a silicone protective wrap that cushions the gauge body. These stack on top of the original PRO’s best features: a stainless brew path, integrated gauge, larger chamber, and the metal drip tray. The result is a portable machine that feels robust in the hand and survives travel without drama.
The brew path material choices are not cosmetic. Stainless steel resists corrosion and pitting, it sheds coffee oils with a quick rinse, and it keeps heat better than thin polymer parts. The copper-plated base is aesthetic, yet it also adds a touch of mass near the exit, which contributes to temperature stability on small doses. The two-piece tray cleans easily and gives you a proper landing zone for demitasses or a scale.
Deals of the Week
Ergonomics and Footprint
At 12.5 × 6.25 × 10 in assembled, the PRO 2 fits in tight kitchens, on desks, and in travel bags. Lever throw is smooth, the base is stable at typical espresso forces, and the silicone handle grip keeps your hand secure when you push into the 6–9 bar zone. The spout snaps on and off, so you can brew bottomless for diagnostics or spouted when you want cleaner delivery into two cups. The gauge sits where you can see it without hunching. The cadence is calm once your routine is set.
Warranty and Serviceability
Flair publishes a clear split. The press stand, the brewing cylinder, and the stainless steel plunger carry a five-year functional warranty when used as directed. Wear parts, including O-rings, the dispersion screen, silicone sleeves, piston stem, and the portafilter, carry one year. The quick start guide calls out gauge care: keep it dry outside the water path and protect it from impact. The platform is easy to maintain at home, and every part disassembles without special tools.
How It Brews: The Mechanics That Matter
A manual lever is honest. You control pressure, time, and flow by the force you apply. The PRO 2’s gauge keeps this legible. Flair teaches an espresso zone between 6 and 9 bar, with a target brew time of about 35–45 seconds for the body of the shot. That is a wide, sensible window that accommodates different coffees and grinders. The guide also recommends a short pre-infusion: ease the lever until ~2 bar, hold 5–10 seconds, then ramp steadily to your target. You will see this on the needle in real time.
The 70 ml input volume unlocks ratios beyond the classic 1:2 double. With medium roasts, a 1:2.2 to 1:2.4 shot can open clarity while keeping a syrupy core. Light roasts appreciate the headroom for longer yields. Flair’s own ratios guidance confirms the practical limits: plan on about 60 ml as a hard ceiling for volumetric output, expect less once you account for absorption in the puck, and work by weight for consistency.
Workflow, Step by Step
1) Preheat
The PRO 2 rewards a quick, controlled warm-up. Fit the preheat cap on the cylinder, fill with just-boiled water, and hold about 30 seconds. This raises the metal to a stable temperature without juggling multiple vessels. Dump the water, seat the cylinder on the portafilter, and you are ready to charge with brew water.
Why this matters: small brew heads lose heat quickly to the environment. A single preheat step keeps your first drops hot enough for sweetness, and it narrows shot-to-shot variance when brewing two cups in a row.
2) Dose and prep
Start in the 18–20 g range if your grinder is comfortable there, or choose 16–18 g with a coarser grind if your burrs are new to espresso. The 16–24 g tolerance means you can adjust both recipe and grind geometry as you chase texture or clarity. Use the funnel, distribute carefully with a thin WDT tool if you have one, tamp level, seat the metal screen, and lock in.
3) Fill and seat the stem
Fill the cylinder to the top with near-boiling water, then insert the stem with the gauge and let the excess water overflow the well. This minimizes trapped air and yields a full chamber without guesswork. Rotate the gauge for visibility.
4) Pre-infuse and pull
Lower the lever until the needle wakes up near 1–2 bar. Hold to pre-wet. Watch for the first pearls at the basket edge. Continue down until the needle lands in the 6–9 bar zone. Keep the needle steady through the center of the shot. Ease off slightly at the end if you want to avoid harshness on particular coffees. Aim for 35–45 seconds of brew time once flow begins.
5) Reset and clean
Lift the lever, remove the brew head, knock and rinse. The guide recommends water only. No soap, no dishwasher. Run a quick water-only pull now and then to keep the path clear. Let the gauge stay dry on the outside.
Espresso Performance
Body and sweetness
The PRO 2’s geometry and pressure feedback favor dense, sweet shots with an easy mid-palate. With medium roasts at ~1:2, expect chocolate, caramel, and steady crema. The stainless head holds heat predictably when preheated, which keeps acidity neat without dulling top notes.
Clarity, light roasts, and longer ratios
Light roasts ask for heat and patience. Preheat the cylinder fully, charge with near-boiling water, and extend pre-infusion to saturate the bed. Ride 6–7 bar rather than the top of the zone for a touch more flow and a calmer finish. Push yields to 1:2.3–1:2.5 when the coffee invites citrus or florals. The 70 ml head gives you room to explore these longer shots without a refill.
Repeatability
The gauge is not a gimmick. It shortens the learning curve dramatically. You will see a too-fine grind as a climbing needle and a stalled stream. You will see distribution faults as saw-tooth pressure that rises and dips as channels open. Once you hold the needle steady in the zone, your tongue will confirm that texture and balance have stabilized.
Taste Playbook: Three Proven Recipes
- Balanced house double: 18 g in, 36–40 g out in 30–35 s from first drops. Preheat as directed, pre-infuse to first pearls, hold 2–3 s, then ride ~7–8 bar. This produces syrupy body and a clean finish on medium roasts.
- Chocolate-forward ristretto: 19 g in, 28–32 g out in 25–30 s. Grind slightly finer. Keep pre-infusion short. Pull at 8–9 bar for a more saturated texture.
- Light-roast clarity: 18 g in, 40–45 g out in 32–38 s. Preheat thoroughly. Pre-infuse longer, ramp to ~6–7 bar, and ease the pressure in the final third.
Use these as starting points. Adjust grind first, then dose, then your pressure path. The gauge gives immediate feedback on every change.
Pressure Management With Intention
A manual lever lets you “profile” by hand. You are not chasing bespoke curves. You are choosing a stable zone and how you approach it.
- Gentle start: Stop at ~2 bar for 5–10 s to saturate, then climb to 6–7 bar. This smooths acidity and reduces channeling.
- Classic ramp: Touch 2 bar, then rise to 8–9 bar quickly. Hold through the middle and let the final third drift nearer 6 bar. This preserves crema and body for milk drinks.
- Declining line: Aim for 7–8 bar at first drops, then slowly ease down toward 6 bar as the stream lightens. This protects sweetness on longer ratios.
The PRO 2’s gauge face marks the safe and dangerous zones. Flair’s guide is blunt on the top of the range: if you see 12 bar or more, stop and re-dial. That is a choked puck or a workflow error, not a badge of honor.
Ratios, Yield, and Why Weight Wins
The 70 ml input and ~56–60 ml practical output define the envelope. You can brew a generous double by weight and push past 1:2 when the coffee supports it. The chamber is not designed for a true volumetric double in one fill. Working by grams instead of milliliters is the correct habit. Flair’s own brew-ratios article explains the reservoir and yield relationship clearly.
Grinder Reality
Flair’s page and guide say it plainly. A real burr grinder is required. The PRO 2 is not a pressurized-basket device. The gauge will show inconsistency the moment a grinder drifts or a burr set lacks the espresso range. This is not gatekeeping. It is physics. The machine can only translate what the puck offers into pressure. Expect to live in the lower end of your grinder’s espresso window with the high-flow, tall basket and to tune carefully for light roasts.
Accessories That Make Sense
- Puck screen: The included metal screen works. Paper filters are optional if you want cleaner headspace and slightly faster flow.
- Dosing funnel: Already in the box. Use it for tidy prep.
- Tamper: A stainless 45–46 mm is standard for this head. The included metal tamper is sized correctly for the PRO platform, which removes a common early frustration.
- Carry case: The fitted case protects the gauge and keeps parts together. That matters if you brew in two locations or store the machine between sessions.
Maintenance and Care
Daily: Rinse with water only. Knock the puck, rinse the screen, cylinder, and portafilter, and let them dry. Soap is unnecessary and can taint flavor.
Weekly: Inspect O-rings. If insertion feels dry or sticky, clean and lightly lubricate with a food-safe silicone grease. Keep the gauge dry and avoid impact.
Travel: Use the case. Remove the gauge stem from the head when packing to protect the dial. The silicone wrap around the gauge body adds insurance, not invincibility.
Warranty sanity: Five years on the stand, cylinder, and stainless plunger, one year on wear parts. Keep your proof of purchase.
Shot-to-Shot Cadence
The PRO 2 rewards rhythm. Preheat, prep, brew, rinse, repeat. With practice, your shot-to-shot times settle into a comfortable pace. The stainless head and cylinder hold enough heat post-preheat that a second shot within a couple of minutes feels stable, especially on medium roasts. If you are brewing for a crowd, re-preheat the cylinder briefly between shots. The case dimensions and easy teardown keep all the parts at hand and quickly reassembled once you find your flow.
Milk Drinks Without a Boiler
The PRO 2 does not steam. That is a design choice. Pair it with a compact induction steamer or a quality micro-frother if cappuccinos are daily. Pull the shot first, then steam. The machine’s quiet routine pairs well with a separate steamer because you can hear milk stretch and roll clearly.
Strengths, Limits, and Honest Trade-offs
Strengths
- Live pressure feedback that actually teaches pressure control in real time.
- Stainless brew path that cleans easily and resists corrosion.
- Bigger headroom: 70 ml in, up to ~56 ml out, which opens longer ratios by weight.
- Travel-ready kit with a proper case and all core tools in the box.
Limits
- No heater. You manage temperature with preheat and kettle discipline.
- Capacity still caps volumetric output. Plan by weight.
- The gauge must be kept dry externally and protected from impact.
- Real espresso requires a suitable grinder. Widget baskets are not part of this design.
Comparisons Inside the Flair World
PRO 2 vs small-format heads: The PRO 2’s chamber is larger, the materials are upgraded to full stainless, and the gauge is standard. You gain dose flexibility and a broader ratio range. The trade is a touch more mass and a slightly larger packed size.
PRO 2 vs heated 58 mm platform: The PRO 2 remains far smaller and fully manual. The larger 58 mm ecosystem moves you into café-standard tools and an optionally heated group, yet it sacrifices compactness. Pick PRO 2 for portability and the stainless portable headroom, pick 58 for maximum tool compatibility and on-board heat. (Dimensions, materials, and roles per current Flair pages.)
Full Specifications
| Item | Spec |
|---|---|
| Machine type | Manual direct lever, unheated brew group |
| Brew head | Stainless cylinder and stainless portafilter, copper-plated base |
| Dose range | 16–24 g |
| Input water capacity | 70 ml |
| Practical yield | Up to ~56 ml in one fill |
| Gauge | Analog, 6–9 bar espresso zone, danger above 12 bar |
| Assembled size | 12.5 × 6.25 × 10 in (32 × 16 × 25.4 cm) |
| Case size | 12.5 × 9 × 3.25 in (32 × 23 × 8 cm) |
| Weight | 7 lb (3.18 kg) |
| In the box | Base, post and lever, brew head, removable spout, screen, stainless tamper, funnel, dosing cup, gauge and stem, two-piece metal drip tray, carry case, brew guide |
| Warranty | 5 years on press stand, brew cylinder, and stainless plunger. 1 year on wear items. |
| Grinder requirement | Espresso-capable burr grinder required |
| Data per Flair’s product page and current quick-start guide. |
Troubleshooting With the Gauge
- Shot runs under 25 seconds at pressure: Grind finer or increase dose. Confirm that the pre-infusion was long enough to saturate the bed.
- Needle races above 10 bar: Back off. You are choked. Coarsen slightly, improve distribution, or lower dose. The guide is explicit about avoiding the black zone above 12 bar.
- Flow starts unevenly from the basket: Improve puck preparation. Stir grounds with a thin tool, collapse the mound before tamping, and confirm a level tamp.
- Sour first sip, bitter finish: Start a touch hotter and aim for a gentler pressure line. Preheat well, hold 2 bar longer, then ride 6–7 bar instead of 8–9 bar. Trim the last seconds if the finish dries.
- Shot tastes flat: Reduce pre-infusion or increase peak pressure slightly. Many medium roasts like 7–8 bar. Check freshness.
Longevity and Ownership
A machine that travels will see bumps. The PRO 2’s silicone gauge wrap, lever grip, and metal case parts are subtle but effective armor. The stainless brew path is forgiving. O-rings and the metal screen are inexpensive spares, and the company’s warranty policy is clear about coverage windows. Care is simple, which is the best predictor of long service life.
Scores and Rationale
Espresso Quality: 8.6/10
The PRO 2’s stainless head, larger chamber, and live gauge deliver dense, sweet shots with helpful headroom for longer ratios. Light roasts are viable with solid preheat and precise grinding, and the 70 ml input supports 1:2.3 style shots without a refill.
Milk/Steam: 2.0/10
No steam system. Plan on a separate steamer if milk drinks dominate your routine.
Workflow & Ergonomics: 8.7/10
Setup is quick, the gauge makes feedback immediate, and the removable spout toggles between bottomless diagnostics and tidy service. The carry case and compact size make it realistic to brew away from home.
Build & Reliability: 8.8/10
All-stainless brew path, simple teardown, and a five-year warranty on core metal parts build confidence. Wear items are cheap and easy to replace.
Features: 8.3/10
Live gauge with marked espresso zone, taller chamber, stainless tamper in the box, removable spout, and a solid accessory bundle. There is no heat or steam by design.
Value: 8.9/10
At its typical sale price, you get a genuinely complete manual espresso kit with stainless materials, a carry case, and pressure feedback that accelerates learning. That combination is rare at this size and weight.
Overall: 8.6/10
Pros
- Stainless brew path with larger chamber, 16–24 g dosing and 70 ml input for modern ratios.
- Live pressure gauge with a clear 6–9 bar espresso zone that keeps you on target.
- Bottomless portafilter with removable spout for choice of workflow.
- Compact size and carry case support real portability.
- Five-year coverage on core metal parts for long ownership.
Cons
- No onboard heat or steam, so kettle discipline is required.
- Volumetric output tops out near ~56–60 ml, which caps certain long beverages in one fill.
- Gauge care and O-ring upkeep add minor maintenance steps.
- Demands a real espresso burr grinder.
Who It Is For
- Enthusiasts who want portable espresso with real pressure control and a stainless brew path.
- Learners who value visible feedback from a gauge to accelerate grinder tuning.
- Travelers and small-space brewers who need a complete kit, a compact footprint, and honest shots without electricity.
Who It Is Not For
- Users who want on-board heat or steam in a single appliance.
- Households that prioritize push-button convenience and volumetric dosing.
- Anyone who plans to use pre-ground coffee or a non-espresso grinder.
Buying Guidance
Confirm that your box includes the stainless tamper, the removable spout, the two-piece tray, and the carry case. Check the assembled size against your counter and the case size against your luggage. Budget for a quality burr grinder if you do not already own one, and add a small steamer if milk is part of your daily routine. Flair’s page lists the full contents, dimensions, and typical sale price, which help you plan a complete kit with no surprises.
Verdict
The Flair PRO 2 refines the small-format lever idea into something both serious and portable. The stainless brew path and larger chamber unlock real recipes. The gauge makes pressure control visible and repeatable. The removable spout, metal tray, fitted case, and stainless tamper elevate daily use beyond hobbyist tinkering. You sacrifice on-board heat and steam, and you must bring a proper grinder, yet those are deliberate trade-offs that keep size and cost in check.
If you want tactile espresso with live feedback in a compact package, the PRO 2 is credible, complete, and resilient. It belongs on short lists for travelers, small kitchens, and anyone who likes the idea of a quiet, precise lever that you can put away after service, then pack for the road.
TL;DR: Bigger stainless head, 70 ml in and up to ~56 ml out, 16–24 g dose, live 6–9 bar gauge, removable spout, full tool kit, and a fitted case. It pulls sweet, dense espresso when you preheat and grind well, and it teaches pressure control you can see.
We’ve categorized the best espresso machines for every kind of buyer
Find the right shortlist faster, whether you want convenience, a beginner-friendly setup, a smaller footprint, or better value at a given budget.
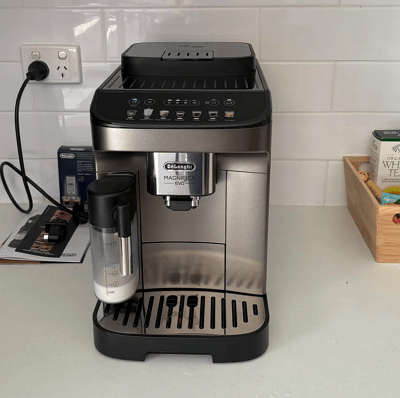
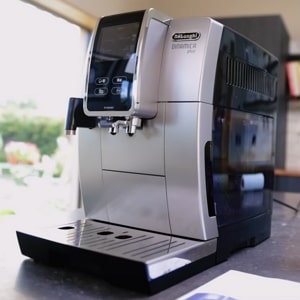
Best Superautomatic Espresso Machines
One-touch picks for speed and convenience.
Best Espresso Machines for Beginners
Easy-to-use machines with a smoother learning curve.
Best Small Espresso Machines
Compact machines for tighter kitchens and counters.
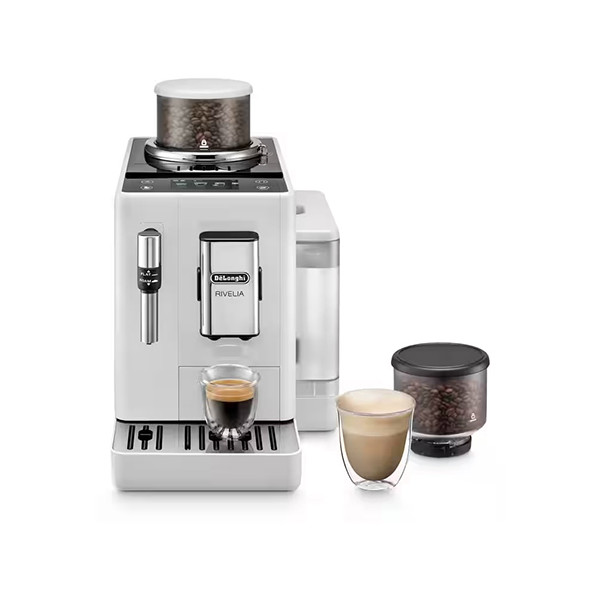
Best Espresso Machines With Built-In Grinder
All-in-one options with fewer extra pieces to buy.
Best Cheap Espresso Machines Under $500
Budget picks that still make sense for real espresso.
Best Prosumer Espresso Machines Under $1000
More serious machines with stronger value for the money.
Best Single Boiler Espresso Machines
Simple, space-saving picks for espresso-first routines.