Master Espresso Technique for Every Machine Type
Great espresso comes down to science and control. Whether you pull shots on a $200 manual lever or a $3,000 super-automatic, the same extraction principles determine what ends up in your cup. Water at 195-205°F (90-96°C) meets coffee grounds at 9 bars of pressure for 25-30 seconds, targeting a 1:2 brew ratio. Master these fundamentals, and you’ll pull balanced shots regardless of your machine type.
Most home baristas assume their equipment limits their results. The truth cuts deeper. Technique matters more than machine cost. A skilled barista with a $400 Gaggia Classic will consistently outperform a beginner on a $2,000 dual boiler. You control grind size, distribution, tamping, and timing. These variables shape extraction far more than any machine feature.
This guide delivers proven techniques for five machine categories: super-automatics, semi-automatics, manual levers, pod systems, and grind-and-brew combos. You’ll learn puck preparation that prevents channeling, temperature management for consistent extraction, milk techniques for cafe-quality drinks, and troubleshooting solutions for common problems. Each machine type gets equal treatment because every path to excellent espresso deserves respect.
The science behind espresso extraction
Espresso is a three-phase system: foam (crema), dissolved coffee compounds in water, and suspended particles with oil droplets. During extraction, pressurized water forces through compacted coffee, dissolving 18-22% of the coffee mass into your beverage. The Specialty Coffee Association defines optimal parameters precisely: brew temperature between 195-205°F (90.5-96°C), extraction pressure at 9 bars with maximum deviation of 0.4 bar, and outcoming extraction yield of 18-22%.
Different compounds extract at different rates. Early extraction (0-15 seconds) pulls pleasant volatiles and sweet notes. Later extraction (15-30+ seconds) draws heavier body compounds and increased bitterness. Pull too fast and you get sour, thin shots. Extract too long and harsh, bitter flavors dominate. The goal is hitting that sweet spot where sweetness, acidity, and subtle bitterness balance perfectly.
Particle size distribution drives extraction consistency. Coffee grinds have a bimodal distribution with larger particles (200-500μm) and fines (particles under 100μm). Fines primarily affect flow dynamics, not extraction efficiency. They fill gaps between larger particles, increasing resistance and slowing water flow. Scientific modeling confirms that particles under 150μm increase extraction time while particles over 250μm decrease it.
Pre-infusion transforms extraction quality. Gently saturating the puck at 1-3 bars for 3-10 seconds before ramping to full pressure reduces channeling dramatically. Dry coffee resists water flow like water on dry soil. Pre-wetting allows even distribution before high pressure hits. This technique also allows CO2 degassing, prevents puck cracking, and lets you grind 1-2 settings finer while maintaining the same shot time.
Shop the essentials
The small upgrades that make a home coffee setup cleaner, smoother, and more enjoyable to use every day.

Cleaner & Descaler Tablets
Keeps your machine clean, helps prevent buildup, and protects long-term performance.
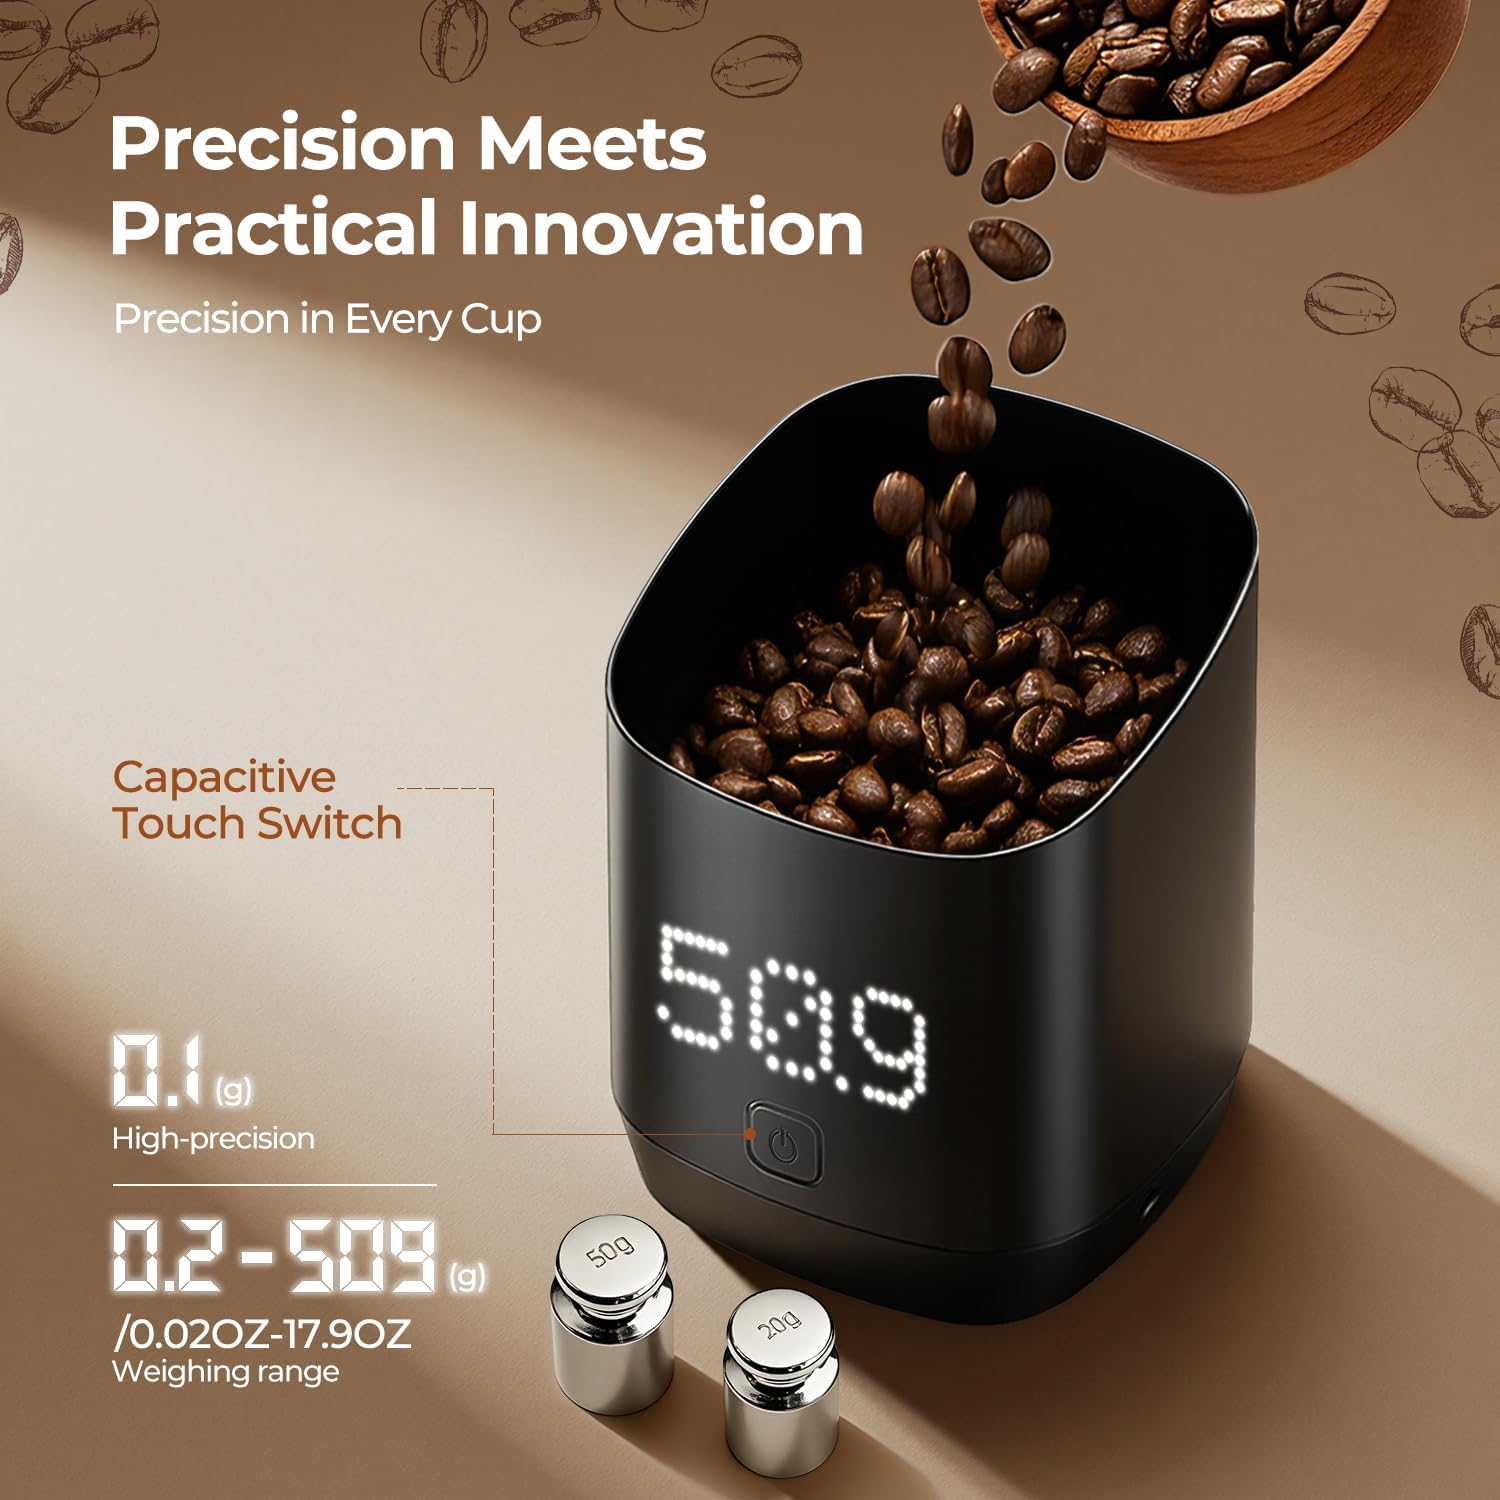
Digital Dosing Cup
Makes weighing beans faster and cleaner, with less mess around the grinder.
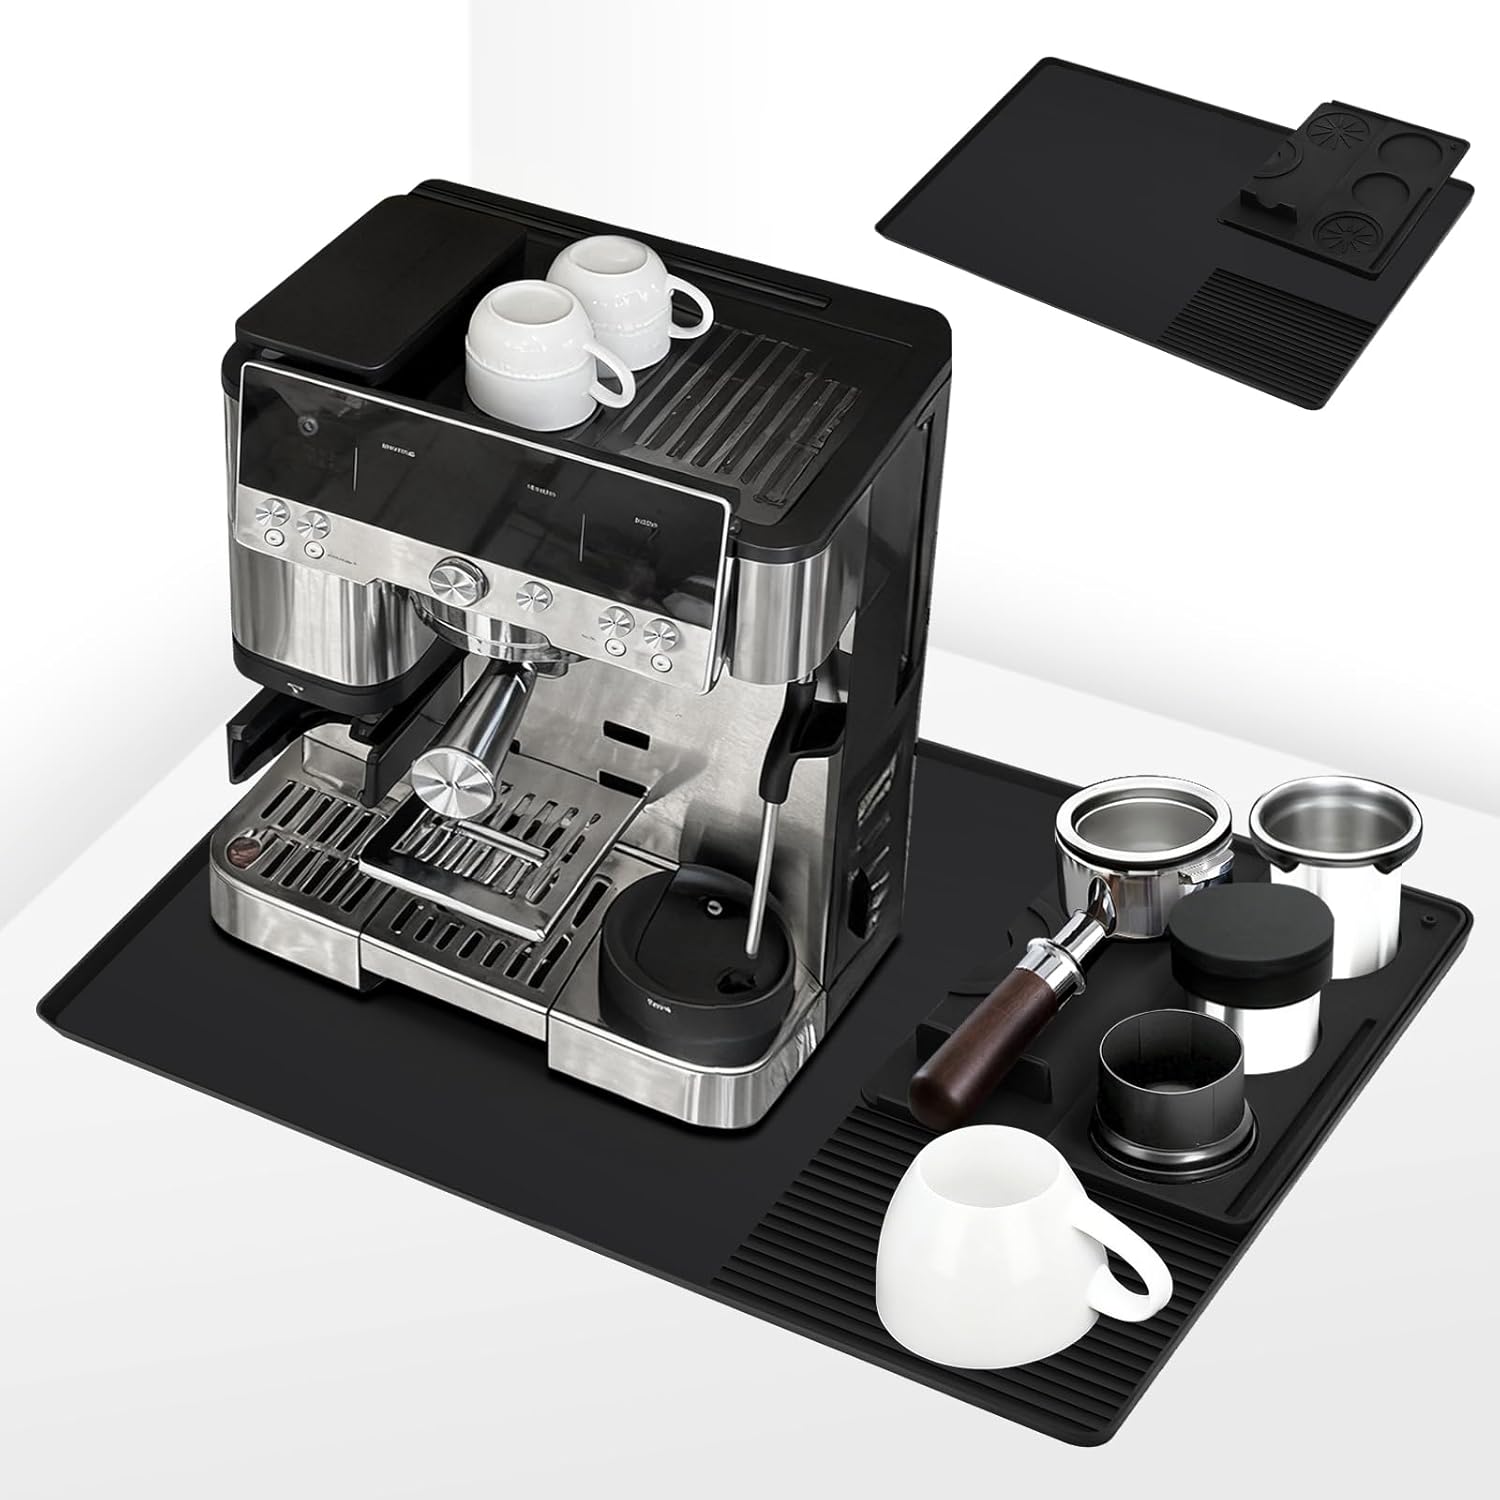
Silicone Mat
Protects your counter, catches spills, and gives your setup a cleaner working surface.

Vacuum Coffee Canister
Helps beans stay fresher longer by limiting air exposure after opening the bag.
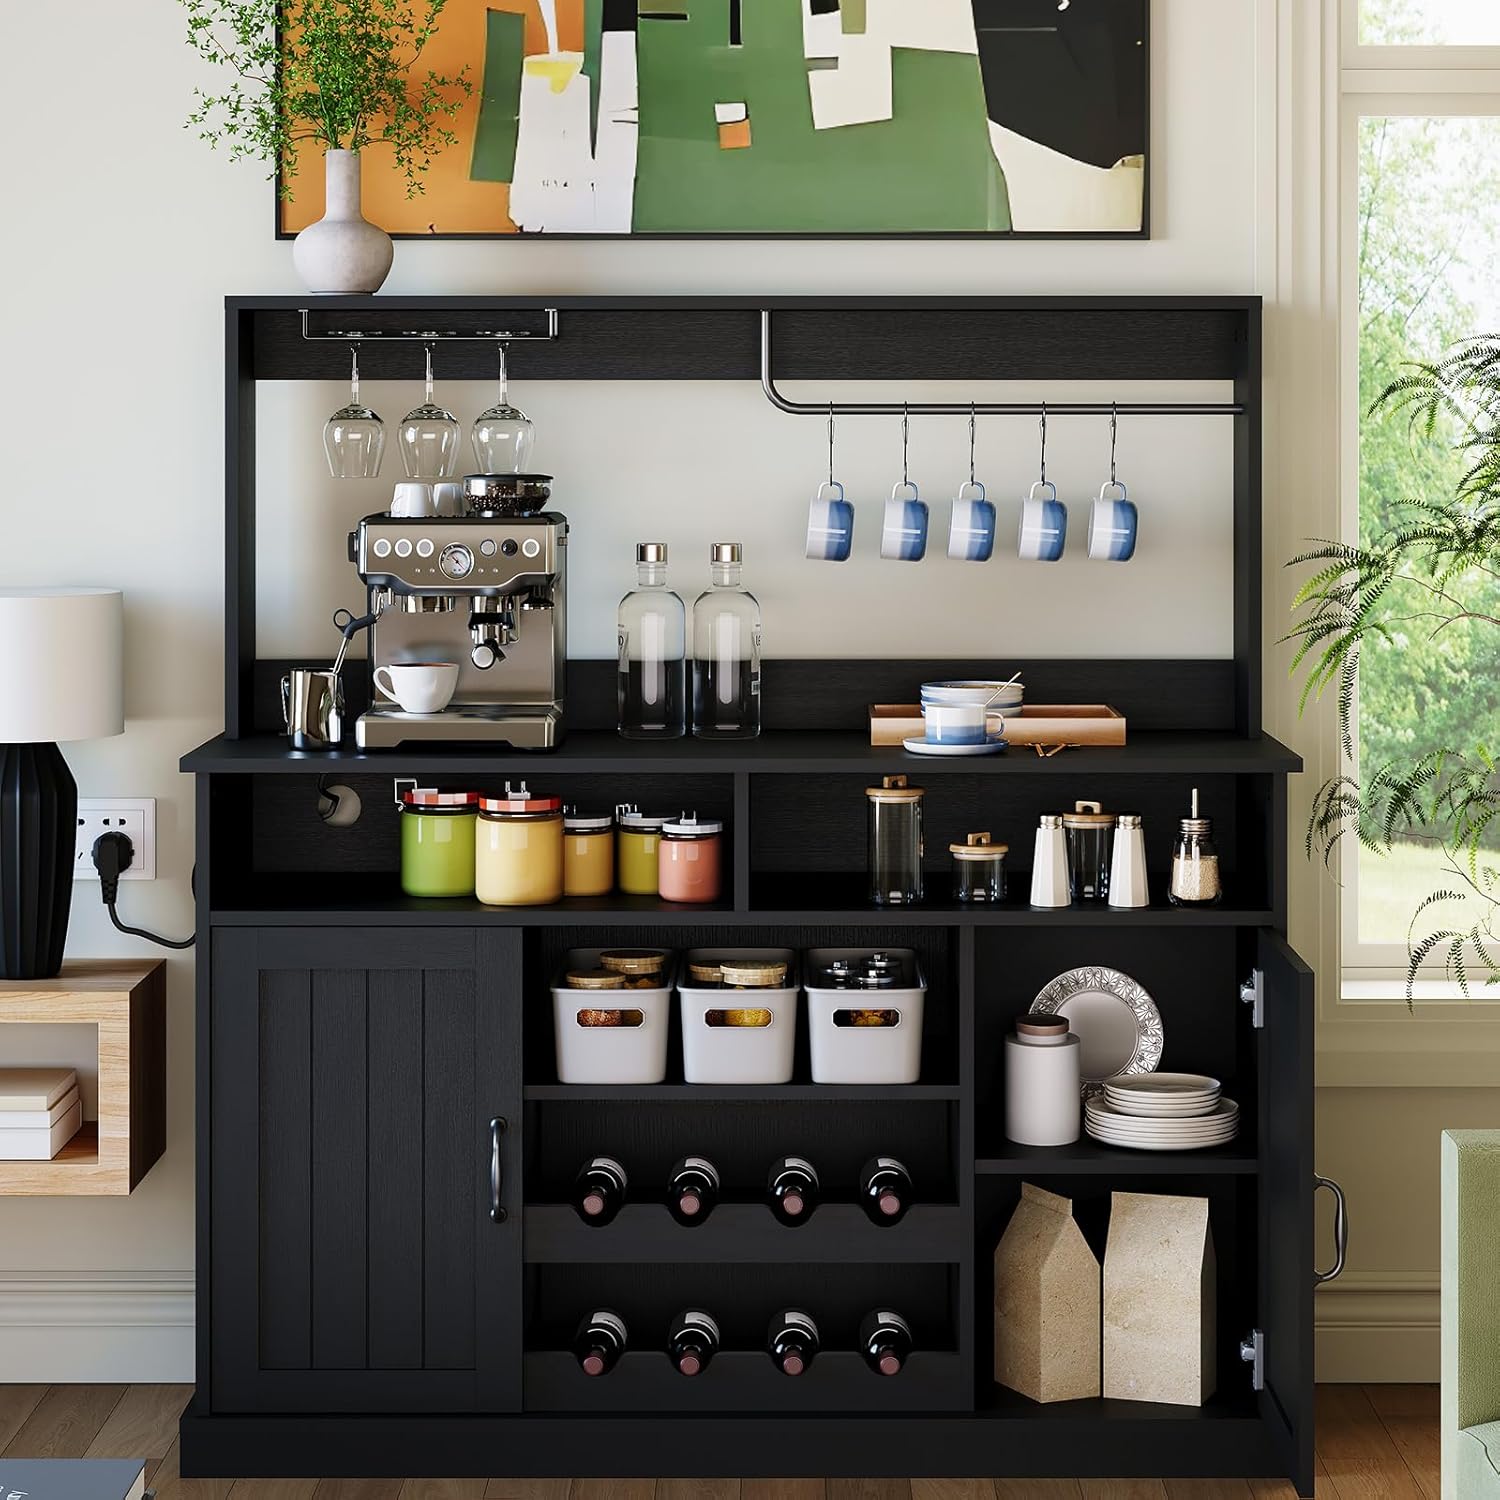
Farmhouse Coffee Bar Cabinet
Gives your machine, cups, beans, and accessories one dedicated home instead of cluttering the kitchen.
Super-automatic machines: one-button convenience with control
Super-automatic machines automate every step from bean to cup. Built-in burr grinders dose coffee automatically, internal brew units tamp consistently, and integrated systems extract at 9 bars with precise temperature control. The entire process takes 30-60 seconds with minimal user input. Major brands like Jura, DeLonghi, Philips, and Gaggia each approach automation differently, but all share core capabilities.
Setup and dialing in
Start by adjusting the internal burr position. Most machines ship with grinders set too coarse for espresso. On Breville machines, you’ll typically need to change the internal burr from factory position 6 down to 5 or 4. DeLonghi machines usually arrive properly calibrated but may need adjustment. Access the burr by removing the bean hopper, lifting the metal ring on top of the grinder, and twisting to a finer setting.
Water hardness setup matters for descaling schedules. Use the included test strip by dipping it for one second in water, waiting one minute, and counting the colored squares. Enter this value into your machine’s menu system. This setting determines when your machine prompts for descaling.
Grind adjustment happens only while the grinder runs. Locate the adjustment dial inside the bean hopper. Start at the middle setting. If your shot pulls too fast (under 10 seconds for 30-35ml), grind finer by moving to a lower number. If the shot drips slowly or chokes, grind coarser. Make single-step adjustments and brew 2-3 shots between changes to clear old grounds from the system.
Coffee strength settings control dose amount, not grind size. Most machines offer 3-5 strength levels representing different coffee quantities (typically 6-16g per shot). Set espresso drinks to maximum strength (4-5 beans on the display) for concentrated shots. Use medium settings (3 beans) for larger coffee drinks like americanos.
Program water volume by selecting a drink, pressing start, and stopping the machine when your desired amount dispenses. The machine saves this volume for future drinks. Target 25-35ml for espresso, 50-70ml for double shots, and 100-150ml for americanos. For larger drinks, program two shots into one cup rather than over-extracting a single dose.
Critical bean selection rules
Never use oily, shiny, or dark-roasted beans in super-automatics. Oils clog the grinder chute between burrs and brew unit, causing permanent damage not covered by warranty. Choose medium to dark roasts with dry surfaces that feel rough, not slippery. Excellent options include Whole Latte Love Crema Wave, Maromas Orphea, Filicori Gran Crema Forte, and illy dark roast. Light roasts also cause problems because extraction time runs too short and hard beans stress grinder mechanisms.
Fill your bean hopper with only 2-3 days worth of beans. Keep the aroma preservation cover sealed when not in use. Store bulk beans separately in an airtight container. For single-hopper machines, use the bypass doser for variety or decaf rather than emptying and refilling the hopper.
Bypass doser technique
The bypass doser lets you use pre-ground coffee without touching hopper beans. Add one scoop (approximately 9-10g for DeLonghi/Philips, 14-15g for Jura) of espresso-ground coffee to the chute. Select the pre-ground function if your machine requires it. The machine brews without activating the grinder. This feature works perfectly for decaf, testing different beans, or using special single-origin coffees. Never exceed one scoop per cycle or you’ll clog the brew unit.
Maintenance for reliability
Daily maintenance takes under five minutes. Empty the drip tray and grounds container after each use. Remove milk system components, disassemble completely, and rinse all parts under water. Run the machine’s rinse cycle. Wipe the coffee spout with a damp cloth.
Weekly cleaning depends on your brew unit type. Removable brew units (DeLonghi, Gaggia, Philips) need removal and thorough rinsing under warm water. Shake gently to remove all grounds, then air dry completely for 30+ minutes. Never use soap or put it in the dishwasher. Non-removable units (Jura) require cleaning tablets through the bypass doser following the automatic cleaning cycle.
Every 400-500 cups or every four months, lubricate removable brew units. Apply a thin layer of food-grade silicone grease to the metal tracks and rails. Don’t over-lubricate. Proper lubrication prevents friction, wear, and extraction problems.
Descaling every 1-3 months prevents scale buildup that damages heating elements and reduces temperature stability. Always use manufacturer-specific descaling solution. Jura needs Jura descaling tablets, DeLonghi requires EcoDecalk solution, and Philips machines need Philips descaling solution. Never use vinegar because it voids warranties and can damage internal components. The complete descaling program takes approximately 40 minutes including rinse cycles.
Semi-automatic machines: traditional control and craft
Semi-automatic machines give you complete control over grinding, dosing, distribution, tamping, and extraction timing. You become the variable. Pump-driven systems deliver consistent 9-bar pressure while you determine everything else. Machines like the Breville Barista Express, Gaggia Classic Pro, Rancilio Silvia, and Lelit Elizabeth represent this category.
Puck preparation fundamentals
Weigh your dose to 0.1g accuracy. Target 18g for a double basket, though basket capacity varies. Match your dose to your basket’s marked capacity within ±2g tolerance. Consistency matters more than the exact number.
Distribution breaks up clumps and creates even density throughout the basket depth. The Weiss Distribution Technique (WDT) uses fine needles (0.3-0.4mm diameter) to stir grounds throughout the entire basket depth. Insert needles to the bottom, stir in overlapping circles, and work from bottom to top. Use a dosing funnel to prevent grounds from spilling. Proper WDT reduces channeling, increases puck resistance, and delivers higher peak pressure during extraction.
Tamping compresses grounds to create uniform resistance. Hold your tamper with fingers on the base for even pressure distribution. Keep your wrist straight and elbow at 90 degrees directly above the portafilter. Apply 30 pounds (13.6 kg) of downward pressure. Coffee stops compacting beyond this force, so additional pressure provides no benefit. Focus on creating a flat, level surface rather than maximum force. Never tap the portafilter sides after tamping because this cracks the puck edge seal.
Inspect your tamped puck. The surface should sit below the basket’s inner ring line, appear perfectly flat with no gaps or holes, and have coffee flush to basket edges. Any gaps create channels where water bypasses coffee.
Dialing in process
Lock in your dose first. Choose 18g for a double shot and keep it fixed throughout dialing. Set your target brew ratio next. The standard 1:2 ratio means 18g coffee produces 36g espresso. Ristretto uses 1:1 to 1:1.5 for concentrated shots. Normale runs 1:2 to 1:3 for balance. Lungo stretches to 1:3 to 1:4 for more volume.
Pull a test shot stopping by weight, not time. Place a scale on your drip tray, zero it, and stop extraction when you reach your target output. Taste the result and note the extraction time. The 25-30 second guideline helps, but taste trumps numbers.
Adjust grind for timing. If your shot finishes too fast (under 20 seconds), grind finer by one increment. If it runs too slow (over 40 seconds), grind coarser by one step. Purge 1-2 doses after each grinder adjustment to clear old settings. Wait for 2-3 shots before adjusting again because grinders need time to stabilize.
Fine-tune by taste once timing lands in range. Sour, sharp notes indicate under-extraction. Try grinding finer, increasing temperature, or extending extraction. Bitter, harsh, astringent flavors signal over-extraction. Grind coarser, decrease temperature, or shorten extraction time. Both sour and bitter simultaneously means channeling. Fix your puck preparation.
Pre-infusion techniques
Machines with pre-infusion capability deliver superior results. E61 group heads allow manual pre-infusion by lifting the brew lever halfway. Line pressure (not the pump) flows water at 2-3 bars to the puck. This only works on plumbed machines because reservoir machines lack back pressure.
Programmable machines like the Lelit Elizabeth and La Marzocco Linea Mini offer electronic pre-infusion control. You can set pre-infusion duration from 0-10 seconds at 3-6 bars. Start with 3-4 seconds and adjust based on results.
Breville machines include built-in low-pressure pre-infusion on most models. Basic models don’t allow adjustment, but higher-end versions like the Dual Boiler offer programmable settings.
Manual flow control paddles (Lelit Bianca, Profitec Pro 700) give infinite adjustability. A typical recipe starts with 3-4 seconds at 4-5 bars, then ramps to full 9-bar pressure. This approach requires hands-on attention but delivers maximum control.
Pressure and temperature management
Many consumer machines ship at 12-15 bars, which causes channeling and over-extraction. Adjust your OPV (Over Pressure Valve) to 9 bars. Gaggia Classic requires an aftermarket spring kit. Breville machines need internal adjustment. Rancilio Silvia has user-adjustable OPV documented in the manual.
Temperature surfing compensates for single-boiler temperature swings. Flush water through the group until the heating light turns off. Wait for the light to turn back on, then wait 10 additional seconds. Optionally engage the steam button for 3-6 seconds, turn it off, wait 3-4 seconds, and pull your shot. This technique applies to Gaggia Classic Pro, Rancilio Silvia without PID, and Breville Barista Express without modification.
PID controllers eliminate temperature surfing. Dual-boiler machines provide rock-solid stability. Set brew temperature between 195-205°F (90-96°C). Light roasts often prefer 200-205°F while dark roasts work better at 195-199°F.
Common mistakes and solutions
Channeling shows as spurting jets with a bottomless portafilter, simultaneous sour and bitter taste, and visible cracks or holes in spent pucks. Fix it with thorough WDT, level tamping at consistent pressure, proper dose for your basket, and regular cleaning of your shower screen.
Pucks sticking to the shower screen indicate overdosing or too-fine grind combined with proper dose. Reduce dose by 1-2g or grind slightly coarser. Your puck should never touch the screen before extraction begins.
Temperature inconsistency between shots requires preheating. Lock your portafilter in the group during the 20-minute warm-up period. Run blank shots to heat the group head. Preheat cups on the warming tray. Single-boiler machines need temperature surfing technique.
Manual lever machines: hands-on pressure control
Manual lever machines split into two types: spring-lever and direct-lever. Spring-lever machines (Profitec Pro 800, La Marzocco Leva) use compressed springs to provide automated pressure. You pull the lever down to load the spring, then release. The spring applies declining pressure from 9-12 bars initially, tapering to 3.5-4 bars by shot end. This profile mimics constant flow rate and suits medium-dark roasts perfectly.
Direct-lever machines (La Pavoni Europiccola, Flair, Cafelat Robot, ROK, Strietman CT2) give you complete manual control. Your arm provides all pressure throughout extraction. You can create any pressure profile imaginable. This flexibility allows unlimited experimentation but requires developed skill and muscle memory.
Lever technique essentials
Puck preparation follows semi-automatic standards. Use WDT, consistent dosing (14-20g depending on basket size), and level tamping at 25-30 pounds. These fundamentals matter even more on lever machines because you can compensate for minor prep errors during extraction through pressure modulation.
Grind slightly coarser than pump machines. Lever extraction typically runs longer due to declining pressure creating slower flow. The longer contact time extracts adequately with slightly larger particles. Start at standard espresso fineness and adjust coarser if needed.
Pre-infusion technique varies by design. On spring levers, pull the lever fully down and hold it to control pre-infusion duration before releasing. On direct levers, raise the lever smoothly to fill the chamber (avoiding air), then begin downward pressure slowly. Apply 1-2 bars of gentle pressure for 5-15 seconds. Light roasts benefit from longer pre-infusion (up to 15 seconds). Never release or pump the lever during pre-infusion. Maintain constant forward pressure.
Extraction pressure for direct levers targets 6-9 bars. Approximately 25 pounds of straight-down force creates 7-8 bars on most manual machines. Use a bathroom scale to calibrate your force. Apply pressure gradually over 5-10 seconds, then maintain or modulate based on visual flow. Target 25-45 second total extraction, longer for light roasts.
Model-specific guidance
La Pavoni machines require 10-minute warm-up with ideal boiler pressure at 0.5-0.7 bars. Group head temperature should read 80-90°C externally. Never warm up longer than 20-25 minutes because overheating causes burnt, bitter shots. Pre-infusion should last 6-10 seconds passively.
Flair espresso makers need water at 200-204°F (93-96°C). Preheating is critical. Pour boiling water through the cylinder and let it sit for 30-60 seconds before brewing. Grind fine, slightly coarser than standard pump espresso. Pre-infusion at 2 bars for 5-10 seconds works well. Ramp to 6-9 bars over 35-45 seconds. Use the pressure gauge during learning to build consistency.
Cafelat Robot uses dual-arm design with 58mm professional baskets. Target 6-7 bars, not 9 bars. Apply approximately 40 pounds (18 kg) straight down to achieve 7-8 bars. Pre-infusion happens through gravity feeding via the center-hole piston. Never use legs for leverage because this breaks the machine.
ROK espresso requires preheating by running boiling water through the system for over one minute. Grind fine to medium-fine (table salt texture). Dose 16-19g typically. Apply 40 pounds of force for 7-8 bars. Pre-infusion technique involves pushing down until resistance, then holding for 15-20 seconds. Target 25-30 seconds for 36-40g output.
Learning curve expectations
The first week brings frustration with many failed shots. Days 1-2 focus on understanding your machine’s temperament. Days 3-7 produce occasional good shots mixed with inconsistency. Weeks 2-4 deliver consistent decent results as you develop feel for the machine. Months 2-3 produce excellent shots regularly as you master pressure profiling. Long-term, the machine becomes intuitive with micro-adjustments during extraction feeling natural.
Spring-lever machines have virtually no learning curve for pump machine users. Direct-lever machines require 2-4 weeks of daily practice for consistency. The forgiving nature of manual pressure control compensates for minor prep errors, but building muscle memory takes time.
Pod and capsule systems: optimized convenience
Nespresso Original Line uses 19-bar pressure to force hot water through hermetically sealed aluminum capsules. The system offers three brew sizes: ristretto (0.85 oz), espresso (1.35 oz), and lungo (3.7 oz). Temperature runs at 195-205°F with no user adjustment. The integrated Aeroccino frother handles milk separately.
Nespresso Vertuo uses Centrifusion technology. Capsules spin at 7,000 RPM while water injects. Each capsule’s barcode automatically sets brewing parameters including time, temperature, water volume, and rotation speed. This barcode system prevents use of third-party compatible capsules. Users commonly report Vertuo produces coffee that’s not as hot as preferred.
Dolce Gusto machines deliver 15-bar pressure through larger capsules (54mm diameter versus Nespresso’s 37mm). The system offers coffee, espresso, cappuccino, hot chocolate, and tea using separate milk capsules. You manually set water volume using a dial from 1-7. Milk drinks require two capsules: one for coffee, one for milk powder or foam.
Optimization techniques
Machine warm-up matters despite automation. Allow 15-25 seconds after indicator lights stop blinking. Run a blank shot (no capsule) before your first use each day. This heats the group head, internal components, and purges stale water.
Preheat your cup by filling it with hot water from the machine’s hot water function. Let it sit during machine warm-up, then empty immediately before brewing. This prevents espresso from cooling rapidly and maintains crema longer.
Cup size programming improves consistency. Press and hold the brew button while extracting. Release at your desired volume. The machine saves this setting for future brews. Target 30-40ml for espresso quality rather than default volumes.
Capsule storage affects flavor. Keep capsules in original sealed sleeves. Nitrogen-flushed capsules maintain freshness when properly stored. Avoid refrigerator or freezer storage because condensation compromises seals. Store in a cool, dry place away from direct sunlight and heat.
Maintenance requirements
Descaling ranks as the most critical maintenance task. Scale buildup reduces water flow, lowers temperature, and damages machines. Descale every three months or 300 capsules, whichever comes first. Hard water areas need descaling every two months. Soft water areas can extend to six months.
Use only manufacturer descaling solutions. Nespresso requires Nespresso descaling solution. Vinegar and third-party solutions damage internal components and void warranties. Mix solution with 0.5L water in the tank, enter descaling mode through the button combination specific to your model, run the full tank through, and rinse with two full tanks of fresh water. Total duration runs 15-20 minutes.
Daily cleaning involves emptying drip tray, removing and rinsing capsule container, and wiping exterior surfaces. Clean the capsule holder for coffee residue buildup weekly.
Reality check on limitations
Pod systems sacrifice quality and control for convenience. Testing by CHOICE with blind taste panels consistently ranks manual machine espresso significantly better than pod coffee. Pre-ground coffee in capsules is weeks to months old, well past the 5-14 day peak flavor window. Fixed parameters prevent adjustment of grind size, dose, or extraction time. Pressure of 15-19 bars exceeds the optimal 9 bar standard. Crema is often artificially enhanced rather than indicating true extraction quality.
Cost per cup runs $0.85-1.30 for Nespresso capsules versus $0.20-0.35 per shot using fresh beans with traditional machines. Long-term, pod systems cost significantly more despite lower initial investment. Environmental impact remains substantial. Aluminum capsules require specialized recycling through Nespresso’s program. Plastic capsules often can’t be recycled at all.
Pod systems make sense for office settings, users with dexterity challenges, extreme time constraints under two minutes, and people with no desire to learn espresso technique. They deliver consistent results without skill requirements. Accept that you’re prioritizing convenience over quality ceiling.
Grind-and-brew combo machines: integrated convenience
Breville and DeLonghi dominate grind-and-brew combos. These machines integrate burr grinders directly into espresso machines, combining convenience with more control than pod systems. You still grind, distribute, tamp, and time extraction manually, but everything sits in one footprint.
Breville models and features
The Barista Express ($700) started the all-in-one category. It offers manual tamping with 16-30 grind settings and a 54mm portafilter. The Barista Pro ($850) adds faster heat-up with ThermoJet heating, LCD display, and improved steam wand. The Barista Touch ($1,000) includes a color touchscreen with guided workflow and automatic milk frothing. The Barista Touch Impress ($1,300) combines touchscreen convenience with assisted tamping through the Impress Puck System.
All Breville machines share a common challenge: grinders set too coarse from the factory. You’ll need to adjust the internal burr position. Remove the hopper, lift the metal ring on top of the grinder, twist to a finer setting (from default position 6 down to 5 or 4), then work your way through external dial settings starting at coarsest.
DeLonghi La Specialista line
La Specialista models include Arte ($700), standard Specialista ($800), Prestigio ($1,000), Maestro ($1,400), and Opera ($1,500). All use 51mm portafilters, smaller than Breville’s 54mm and significantly smaller than commercial 58mm standard. Grinders offer 8 settings compared to Breville’s 16-30, providing less precision for dialing in.
The smart tamping station uses a lever-pull system for consistency. Higher models include active temperature control and automatic milk frothers. The Opera adds cold brew functionality.
Setup and calibration
Ignore the machine’s built-in dosing timer. These systems grind by time, not weight, creating dose inconsistency. Always weigh your dose on a scale. Target 17-18g for double shots. Grind into a dosing cup, then transfer to the portafilter using a dosing funnel.
Adjust grind only while the grinder runs. Start at the middle external setting. If your shot pulls too fast (under 20 seconds) and tastes sour, grind finer by one increment. If it drips slowly (over 35 seconds) and tastes bitter, grind coarser by one step. Purge 5-10g between adjustments to clear old grounds. Make only one adjustment at a time.
Most machines need internal burr adjustment eventually. When your external dial maxes out at the finest setting but shots still run too fast, adjust the internal burr one position finer. Reset your external dial to the coarsest setting and work your way down to find the proper setting. Don’t try to correlate settings between internal positions.
Milk frothing approaches
Breville machines use single-hole steam tips requiring manual technique. Position the tip just below the surface, off-center. Start steam at full power. Stretch milk for 5-10 seconds with a gentle ripping sound. Lower the pitcher 1cm when milk reaches body temperature to create a rolling vortex. Stop when too hot to touch (140-150°F or 60-65°C). This approach gives more control for latte art but requires practice.
DeLonghi uses panarello wands with built-in air valves. Turn the valve to control foam amount. This design requires less skill but provides less control. Higher DeLonghi models include automatic frothers with temperature probes for hands-free operation. Results are consistent but very thick foam.
Common mistakes specific to combos
Using the built-in dosing timer creates the biggest inconsistency. Dose by weight every single time. Not adjusting the grinder from factory settings produces weak, sour espresso. Fix internal burr position and dial in properly. Adjusting tamp pressure instead of grind leads to frustration. Use consistent 30-pound tamps and adjust grind only.
Changing multiple variables at once prevents diagnosis. Adjust grind, dose, or time independently. Not distributing grounds before tamping causes channeling. Use WDT or tap the portafilter sides. Skipping machine warm-up produces under-extracted shots. Allow 15-20 minutes, run a blank shot, and preheat the portafilter.
Milk steaming and frothing across machine types
Manual steam wand technique splits into two phases. Stretching (aeration) happens with the wand tip 1-2mm below the surface, positioned between center and wall at a 20-30 degree angle. Listen for gentle “ripping paper” sounds. Continue for 5-10 seconds until volume increases by 20-50%. Complete this phase before milk reaches 99°F (37°C).
Texturing (rolling) begins when you raise the pitcher 1cm to submerge the wand deeper. Create a vortex to break down bubbles into microfoam. Target temperature ranges from 140-150°F (60-65°C) for dairy milk. Plant-based milks need 125-135°F (53-57°C), about 10°F lower. Never exceed 160-165°F (71°C) because proteins denature and foam collapses.
Milk type performance
Whole milk (3.25-3.5% fat) creates the densest, creamiest foam with smallest, most uniform bubbles. It takes longer to froth but provides the most stable foam. Target 140-155°F for optimal results.
Oat milk ranks as the best non-dairy option. Use Barista Edition formulations (Oatly, Califia Farms). It creates rich, creamy, stable foam similar to dairy and works best for latte art among plant milks. Temperature range runs 130-150°F. Oat milk can thicken and become gummy above 150°F.
Soy milk provides high protein for thick, substantial froth with neutral flavor. It resists temperature up to 149°F (65°C) but can curdle if heated too quickly. Use unsweetened varieties for best results.
Almond milk’s low protein creates less stable foam with larger bubbles and tendency to separate. Use Barista Blends and keep temperature under 130°F (55°C). This option works best for iced drinks.
Automatic frother systems
Integrated milk carafes and standalone electric frothers (Aeroccino, Breville) provide zero learning curve with consistent results. Add cold milk, select foam type and temperature, and the system handles everything. Pre-programmed time and temperature settings deliver hands-free operation.
Quality suffers compared to manual technique. Automatic systems generally produce larger bubbles, less optimal microfoam, and fixed temperature around 140°F. Customization is limited. Latte art becomes difficult with most automatic systems.
Optimize automatic frothers by using cold, fresh milk, respecting maximum fill lines, cleaning after every use, choosing the right setting for your drink, using Barista Blends for plant milks, and pouring immediately after frothing completes.
Steam wand maintenance
Purge and wipe after every single use. Turn off steam with the tip still in milk. Remove the pitcher. Purge for 2-3 seconds into the drip tray. Wipe with a damp microfiber cloth (not dry). Purge again for 2-3 seconds. This prevents milk from baking onto the hot wand, which happens in seconds and creates bacterial growth.
Weekly deep cleaning requires milk system cleaner (Cafiza, Puly, Rinza). Mix 50ml cleaner with 500ml hot water. Submerge the tip and run steam through for 30 seconds. Soak for 5-15 minutes. Run fresh water rinse. Remove the tip, clean holes with a pin, scrub with a brush, and reassemble.
Panarello attachments need daily disassembly. Remove the frothing sleeve, unscrew the cap nut, remove the inner wand and gaskets, wash all parts in hot soapy water, clear the air intake hole thoroughly, and reassemble with all gaskets in place.
Universal troubleshooting guide for all machines
Problem: Channeling with spurting, uneven flow
Visual signs: Jets shooting from specific spots with naked portafilter, uneven flow with some areas pouring while others stay dry, sudden speed increase mid-shot, visible cracks in spent puck
Taste: Simultaneously sour and bitter, sharp acidic notes with bitterness, muddied unclear flavors
Primary causes: Uneven distribution with clumped grounds, poor tamping (canted, uneven pressure), cracks in puck from tapping portafilter, improper dose (underfilling or overfilling)
Solutions: Use WDT with needle tool throughout basket depth, tap portafilter before tamping (not after), level tamp with consistent 30-pound pressure, dose accurately (18-20g for double), clean shower screen and group head weekly
Problem: Under-extraction (sour, thin shots)
Visual signs: Blonde crema that’s very light, thin crema disappearing quickly, fast extraction time under 20 seconds, rapid gushing flow
Taste: Sour, acidic, sharp, thin body, watery, weak hollow flavor, lacks sweetness
Primary causes: Grind too coarse, dose too low, water temperature too low (below 190°F/88°C), insufficient tamping, stale beans, channeling
Solutions: Grind finer in one-step increments, increase dose to 18-20g, raise temperature 1-2°F, use fresh beans within three weeks of roast, improve distribution and tamping, allow proper machine heat-up
Problem: Over-extraction (bitter, harsh shots)
Visual signs: Dark brown to blackish crema, thick dark crema with air bubbles, slow dripping flow, dark outer ring or burnt appearance
Taste: Bitter, harsh, astringent, burnt or ashy notes, prickly-sharp bitterness, salty undertones, hollow despite bitterness
Primary causes: Grind too fine, dose too high, water temperature too hot (above 201°F/94°C), excessive tamping pressure, machine overheating, shot pulled too long
Solutions: Grind coarser incrementally, reduce dose slightly, lower temperature 1-2°F, use lighter tamp pressure, stop shot earlier at normal blonding point, cooling flush on E61 machines, darker roasts at lower temps (195-199°F)
Problem: No crema or very thin crema
Visual signs: Clear espresso with no foam layer, minimal crema that disappears in seconds
Primary causes: Old stale beans (over three weeks, no CO2), pre-ground coffee (oxidized), grind too coarse, insufficient pressure (below 6 bar), water too cold, light roast coffee
Solutions: Use fresh beans within 5-21 days of roast, grind finer, increase dose, check machine pressure reaches 9 bar, increase temperature, switch to medium-dark roast
Problem: Inconsistent temperature shot-to-shot
Symptoms: First shot different from second, varying extraction times with same recipe, alternating sour and bitter shots
Thermoblock machines: Cold group head and portafilter act as heat sinks. Preheat portafilter in group for 15-20 minutes, run blank shots to warm group, don’t rely solely on ready light
E61 machines: Overheating over time. Allow 20-30 minute heat-up minimum, cooling flush for 2-3 seconds before each shot, keep portafilter locked in during heat-up
Single boiler without PID: Temperature cycling. Temperature surfing required, wait specific time after ready light, pull shot just before light cycles on again, PID modification highly recommended
Problem: Low or high pressure
Low pressure symptoms: Thin pale crema, fast extraction, watery shot, pressure gauge stays below 6 bar
Low pressure causes: Worn pump after 4-5 years, grind too coarse, stale beans, failed OPV, pump gasket worn, scale buildup, group head gasket leak
Low pressure solutions: Replace pump O-ring or gasket, replace vibratory pump ($30-50), grind finer for proper resistance, use fresh beans, descale machine, replace group gasket
High pressure symptoms: Very dark thick crema, excessive channeling with spurting, over-extraction, gauge consistently above 11 bar, destroyed puck
High pressure causes: OPV set too high, factory settings (common on Gaggia, Breville)
High pressure solutions: Adjust OPV to 9 bars (vibratory: adjust screw on pump; rotary: adjust pressure screw while pulling shot), factory settings often require modification
Problem: Static and clumping from grinder
Static symptoms: Grounds flying everywhere, coating grinder interior, sticking to plastic parts
Static solutions: Ross Droplet Technique (add 1-2 drops water to beans before grinding), wait 2-5 minutes after grinding before opening, tap container firmly, use metal container instead of plastic, grind into metal cup
Clumping causes: Excessive coffee oils from dark roasts, very fine grind, static electricity, humid conditions, clogged grinder
Clumping solutions: WDT to stir grounds with needle tool, RDT to spritz water on beans, clean grinder of oil buildup, slightly coarser grind, use distribution tool, replace old stale coffee
Comparison table: technique differences by machine type
| Element | Super-Automatic | Semi-Automatic | Manual Lever | Pod/Capsule | Grind-and-Brew |
|---|---|---|---|---|---|
| Grind control | Built-in, 5-13 settings | Separate grinder, 40+ settings | Separate grinder, 60+ settings | Pre-ground capsules | Built-in, 8-30 settings |
| Dosing | Automatic, 6-16g | Manual weighing, 18-20g | Manual weighing, 14-20g | Fixed in capsule | Semi-automatic, needs scale |
| Distribution | Automatic | Manual WDT essential | Manual WDT essential | Not applicable | Manual WDT recommended |
| Tamping | Automatic, consistent | Manual, 30 lbs | Manual, 25-30 lbs | Not applicable | Manual or assisted |
| Pressure | Fixed 9 bar | Fixed 9 bar (adjustable OPV) | Manual 6-9 bar | 15-19 bar | Fixed 9 bar |
| Pre-infusion | Some models automatic | Manual or programmable | Complete manual control | Not adjustable | Some models, limited |
| Temperature | PID controlled, 3 levels | Range 195-205°F adjustable | Manual monitoring | Fixed, no control | Thermoblock, limited |
| Extraction control | Automatic timing | Manual start/stop | Complete manual control | Automatic, barcode | Manual start/stop |
| Learning curve | Minimal (1-3 days) | Moderate (2-4 weeks) | Steep (2-3 months) | Zero (immediate) | Moderate (1-3 weeks) |
| Maintenance frequency | Daily/weekly/monthly | Daily/weekly/quarterly | Monthly seal lubrication | Daily/quarterly descale | Daily/weekly/monthly |
| Quality ceiling | Very good | Excellent | Exceptional | Good | Very good |
| Consistency | Excellent | Good (skill dependent) | Moderate (skill dependent) | Excellent | Good (skill dependent) |
| Speed per shot | 30-60 seconds | 60-90 seconds | 90-180 seconds | 30-45 seconds | 60-90 seconds |
| Milk capability | Automatic frother | Manual steam wand | Manual steam wand | Separate frother | Manual steam wand |
| Best for | Convenience, volume | Home enthusiast | Coffee geeks | Simplicity, office | Compact all-in-one |
Frequently asked questions
What grind size should I use for my espresso machine?
Texture should resemble table salt to fine sand. Too fine creates choking (no flow), over-extraction, and bitter taste. Too coarse causes gushing, under-extraction, and sour taste. Start at medium-fine and adjust based on timing. Target 25-30 seconds for double shots. Each machine and coffee requires different settings. Grind finer for under-extracted (sour) shots and coarser for over-extracted (bitter) shots.
How much coffee should I dose for a double shot?
Eighteen grams serves as the standard starting point for double baskets. Range from 16-20g depending on basket capacity. Match your dose to basket markings. Weigh to 0.1g accuracy using a scale. Consistency matters more than exact numbers. Never vary dose when troubleshooting. Lock in your dose, then adjust grind only.
Why do my shots taste both sour and bitter?
Simultaneous sour and bitter indicates channeling. Water finds paths of least resistance through your puck, causing some areas to over-extract (bitter) while bypassing others that under-extract (sour). Fix puck preparation. Use WDT to break clumps and create even density. Tamp level with consistent pressure. Ensure proper dose for your basket. Clean your shower screen weekly. Check machine pressure (should be 9 bars, not 12-15 bars).
How do I know when to stop pulling my shot?
Stop by weight, not time. Place a scale on your drip tray, zero it, and stop when you reach your target output. Standard 1:2 ratio means 18g input produces 36g output. Visual cue: stop when espresso turns from rich brown to pale blonde. Taste matters most. Some coffees taste best at 1:1.5 (ristretto), others at 1:2.5 (normale). Timing (25-30 seconds) serves as a guideline, but prioritize taste over numbers.
What temperature should I brew espresso?
Target 195-205°F (90-96°C) measured at the group head. Light roasts often prefer the higher end (200-205°F) to extract properly. Dark roasts work better at the lower end (195-199°F) to avoid excessive bitterness. Most machines have fixed temperatures or 3-level settings. Single boiler machines without PID require temperature surfing. Dual boiler machines offer precise control. Water too cold causes sour, thin shots. Water too hot creates bitter, burnt flavors.
How often should I clean and maintain my machine?
Daily: flush group head after each shot, purge and wipe steam wand after milk frothing, empty drip tray. Weekly: backflush semi-automatics with detergent, rinse removable brew units on super-automatics, deep clean steam wand. Monthly: descale if hard water (quarterly for soft water), deep clean brew unit with tablets on super-automatics, lubricate brew unit, clean grinder burrs. Annually: replace group gasket and shower screen, professional service for commercial machines. Proper maintenance extends machine life from 2-3 years to 15+ years.
Can I use any grinder with my espresso machine?
You need a burr grinder capable of grinding fine enough for espresso with stepless or stepped adjustment. Blade grinders cannot produce consistent particle size distribution required for espresso. Minimum investment runs $200-300 for acceptable grinders (Baratza Encore ESP). Better grinders ($400-700) like Eureka Mignon series deliver superior consistency. Grinder quality impacts shots more than machine quality. A $400 machine with $500 grinder outperforms a $2,000 machine with $100 grinder.
What causes channeling and how do I prevent it?
Channeling happens when water finds paths of least resistance rather than flowing evenly through coffee. Primary causes: uneven distribution with clumps, poor tamping technique, cracks from tapping portafilter after tamping, improper dose, grind too fine creating weak spots, machine pressure too high. Prevention: use WDT to break clumps throughout entire basket depth, tamp level with consistent 30-pound pressure, dose accurately for basket capacity, adjust OPV to 9 bars, clean shower screen weekly, use dosing funnel to prevent grounds on basket rim.
Why doesn’t my machine make crema?
Stale beans (over three weeks from roast date) lack CO2 needed for crema formation. Other causes: grind too coarse, insufficient pressure (below 6 bar), water temperature too cold, underdosing, light roast coffee, pre-ground coffee oxidation. Solutions: use fresh beans within 5-21 days of roasting, grind finer, check machine reaches 9 bar pressure, increase brew temperature, increase dose to 18-20g, switch to medium-dark roast. Crema quality indicates extraction but doesn’t guarantee good taste.
Should I use tap water or filtered water?
Water hardness determines descaling needs and affects taste. Test with hardness strips. Target 50 ppm (3 grains per gallon) for optimal extraction and machine longevity. Hard water (over 180 ppm) causes limescale buildup requiring descaling every 1-2 months. Soft water (under 34 ppm) creates flat taste and can damage aluminum boilers. Use filtered water with proper mineral content. Install in-tank filters or pitcher filters. Never use distilled or reverse osmosis water without remineralization. Water quality issues void most warranties.
Key takeaways for espresso excellence
Equipment matters less than technique for home baristas. Master fundamental principles first: proper grind size, accurate dosing, even distribution, consistent tamping, and extraction monitoring. These skills transfer across all machine types. A skilled barista pulls excellent shots on entry-level equipment while beginners struggle with expensive machines.
Fresh beans determine your quality ceiling. Use coffee 5-21 days from roast date. Pre-ground coffee and stale beans make excellent espresso impossible regardless of technique or equipment. Store beans in airtight containers away from light and heat.
Distribution prevents channeling better than tamping pressure. Spend time on WDT with fine needles breaking up all clumps. Tamp level at 30 pounds. Additional pressure beyond this provides no benefit. Your goal is even density throughout the puck, not maximum compression.
Adjust one variable at a time when troubleshooting. Change grind, dose, or temperature independently. Multiple simultaneous changes prevent diagnosis. Grind adjustment fixes most problems. Resist the urge to adjust tamp pressure or technique before changing grind settings.
Temperature stability requires proper warm-up. Allow 15-30 minutes depending on machine type. Preheat your portafilter, preheat cups, and run blank shots before pulling espresso. Single boiler machines need temperature surfing. PID controllers and dual boiler machines eliminate this requirement.
Maintenance determines machine longevity and shot quality. Daily cleaning prevents rancid oil contamination. Weekly backflushing (semi-automatics) and brew unit cleaning (super-automatics) maintain pressure and flow. Monthly descaling protects heating elements and ensures temperature stability. Water quality ranks as the number one factor in machine lifespan. Use filtered water testing at 50 ppm hardness.
Milk technique separates acceptable from excellent drinks. Position your steam wand tip just below the surface for 5-10 seconds of stretching. Create a rolling vortex for texturing. Stop at 140-150°F (60-65°C) for dairy, 10°F lower for plant milks. Purge and wipe after every use. This habit prevents clogs and bacterial growth.
Your palate guides final adjustments. Numbers provide starting points but taste determines success. Sour indicates under-extraction requiring finer grind or higher temperature. Bitter signals over-extraction needing coarser grind or lower temperature. Both simultaneously means channeling. Balanced shots taste sweet with pleasant acidity and subtle bitterness.
We’ve categorized the best espresso machines for every kind of buyer
Find the right shortlist faster, whether you want convenience, a beginner-friendly setup, a smaller footprint, or better value at a given budget.
Best Superautomatic Espresso Machines
One-touch picks for speed and convenience.
Best Espresso Machines for Beginners
Easy-to-use machines with a smoother learning curve.
Best Small Espresso Machines
Compact machines for tighter kitchens and counters.
Best Espresso Machines With Built-In Grinder
All-in-one options with fewer extra pieces to buy.
Best Cheap Espresso Machines Under $500
Budget picks that still make sense for real espresso.
Best Prosumer Espresso Machines Under $1000
More serious machines with stronger value for the money.
Best Single Boiler Espresso Machines
Simple, space-saving picks for espresso-first routines.