
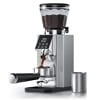

Even Ground Distribution: The Critical Step Between Grinding and Extraction
Uneven coffee distribution creates channels where water flows through the path of least resistance. Your shot under-extracts in dense zones and over-extracts where grounds are sparse. The result: sour notes mixed with bitterness, thin body, and crema that collapses in seconds instead of lasting a full minute.
Proper distribution ensures uniform water contact across all grounds. The difference in extraction yield between proper distribution and clumping reaches 15-20% according to refractometer measurements from specialty coffee research. A well-distributed puck extracts balanced sweetness and acidity without the harsh edges that signal channeling.
Why Distribution Matters More Than You Think
When you grind coffee, the burrs create clumps held together by static electricity, moisture, and mechanical compression. These clumps vary in density. Drop them into your portafilter and you get a chaotic landscape of peaks, valleys, and compressed pockets.
Lock that uneven puck into your machine and water takes the easy route. It rushes through the loose areas in under 20 seconds, pulling only surface-level acids and creating sourness. Meanwhile, the dense zones trap water, over-extracting bitterness and astringency. You taste both problems in the same cup.
The science of channeling: Water always follows the path of least resistance. A pressure differential of just 0.5 bar between two areas of the puck causes water to preferentially flow through the lower-resistance zone. This creates a positive feedback loop where initial flow erodes channels deeper, accelerating the imbalance.
Temperature compounds the issue. Water flowing through channels extracts hotter and faster, while stagnant zones stay cooler and under-extract. The temperature delta can reach 8-10°C between channeled and blocked areas according to thermal imaging studies.
Visual inspection fails: You cannot see internal channels. The top surface may look perfectly level while the interior contains clumps the size of rice grains. Only systematic mechanical distribution addresses subsurface density variations.
The WDT Method: Gold Standard for Clump Elimination
The Weiss Distribution Technique breaks up clumps mechanically using thin needles that penetrate the entire puck depth without compressing grounds.
Tools You Need
Needles: Diameter matters. Use 0.3-0.4mm acupuncture needles or similar. Thicker needles (0.6mm+) compress grounds as they pass through, defeating the purpose. Thinner needles eliminate clumps without adding new density problems.
Needle count: 8-12 needles provide optimal coverage. Fewer than 6 needles require too many passes and risk over-working the grounds. More than 15 needles create crowding that prevents effective stirring.
Handle options:
- 3D-printed WDT tools with radial needle arrangement ($15-25)
- Cork with needles inserted at angles ($2 DIY)
- Dedicated WDT tools like the AutoComb or Nucleus ($40-80)
- Straightened paperclips work but lack durability
Basket preparation: Use a dosing funnel or collar that fits your portafilter. This contains grounds during distribution and prevents spillage. The Breville 54mm system benefits from a magnetic funnel. Commercial 58mm setups need deeper collars for 20g+ doses.
Execution: Step-by-Step WDT Technique
1. Dose accurately Weigh beans before grinding. Use 18.0g for a double basket. Grind directly into the portafilter with the dosing funnel attached. Consistency in dose weight eliminates a major variable.
2. Initial assessment Look at the mound. You’ll see clumps, especially at fine grind settings below espresso range. Note any obvious high spots or asymmetry.
3. First pass: Deep insertion Insert needles vertically to the basket bottom. Push through resistance. The goal is to reach every layer, not just surface grounds.
4. Concentric stirring pattern Start from the center. Stir in a spiral moving outward toward the rim. Move needles in small circles approximately 1cm in diameter. Complete 2-3 full rotations from center to edge.
5. Reverse direction pass Repeat the spiral pattern in the opposite direction. This addresses any directional bias from the first pass. Grounds should now appear fluffy and uniform.
6. Edge attention Pay extra attention to the perimeter. Grounds near the basket wall often remain clumped because initial stirring focuses on the center. Run needles along the inside edge of the basket, breaking up any remaining dense spots.
7. Depth check Insert needles at 3-4 different points to confirm uniform texture throughout the depth. You should feel consistent, fluffy resistance. Hard spots indicate remaining clumps.
8. Surface leveling Remove the dosing funnel. Use a straight finger sweep across the top to level the surface. Don’t compress. Just skim off peaks and fill valleys. The puck surface should sit 3-4mm below the basket rim.
9. Pre-tamp verification Look down at the basket. The surface should be perfectly level with no visible clumps or peaks. If you see any irregularity, repeat WDT focusing on problem areas.
Critical Variables That Change Results
Needle depth: Shallow stirring (top 5mm only) leaves subsurface clumps intact. These create the worst channels because they’re surrounded by loose grounds on top and compressed grounds below. Always reach the basket floor.
Stirring speed: Slow, deliberate stirring breaks clumps effectively. Fast, aggressive stirring pushes clumps around without breaking them. Aim for approximately 1 complete spiral per 3-4 seconds.
Needle angle: Vertical insertion prevents side-loading that could create new density variations. Some baristas use 15-degree angles to address specific clump patterns, but vertical works for 95% of situations.
Grind setting interaction: Finer grinds below setting 5 on most home grinders produce more static and smaller, harder clumps. These require more WDT passes. Coarser grinds above setting 8 may need only a single pass.
Dose relationship: Doses above 20g in a standard basket create thicker puck depth that requires more thorough WDT coverage. Underdosing below 16g makes WDT easier but reduces extraction potential.
Understanding Clump Formation
Static electricity creates the strongest clumping forces. Grinding generates friction that strips electrons from coffee particles, creating positive and negative charges that bind grounds together.
Static factors:
- Humidity below 40% increases static dramatically
- Metal grinder bodies conduct charge better than plastic
- Single-dosing creates more static than hopper grinding
- Dark roasts generate less static than light roasts due to oil content
- Faster grinding (high RPM burrs) produces more static
Grinder design impact: Conical burr grinders produce larger, irregular particles with more surface area for static attraction. Flat burr grinders create more uniform particles that clump less readily but still require distribution.
The Breville Barista Express grinder shows typical retention of 2.7g. This means yesterday’s grounds mix with today’s fresh dose. Old grounds stale overnight, losing CO2 and volatile aromatics. They extract differently than fresh grounds, creating inconsistent shots even with perfect distribution technique.
Static Mitigation: The Ross Droplet Technique
Add a single drop of water (0.05-0.1ml) to beans immediately before grinding. The moisture dissipates static by providing a conductive path for charge equalization.
Execution:
- Weigh beans
- Spray with atomizer or add one drop from wet fingertip
- Shake container to distribute moisture
- Grind immediately
Results: Static reduction of 60-75% according to user measurements with static meters. Grounds flow more freely and clump less. WDT still necessary but requires fewer passes.
Concerns: Long-term moisture exposure can corrode burrs and promote mold growth in the grinding chamber. Use the minimum effective moisture. Never add enough water to make beans visibly wet. If you see surface wetness, you’ve added too much.
Clean your grinder monthly when using RDT. Brush out the burr chamber and wipe down surfaces to prevent moisture accumulation.
Grinder Retention Management
Purge retained grounds before each dose. Run the empty grinder for 1 second. This clears yesterday’s stale coffee from the burr chamber and chute.
Single-dose workflows: Remove the bean hopper. Drop pre-weighed beans directly into the burr chamber. This eliminates hopper popcorning where beans bounce instead of feeding smoothly. Reduces retention to under 0.5g in most grinders.
Bellows or blowers: Force air through the grinding chamber after dosing to push out retained grounds. Reduces waste and improves shot-to-shot consistency. Particularly effective with the Niche Zero and similar low-retention designs.
Distribution Alternatives When You Lack WDT Tools
These methods work better than no distribution but cannot match WDT effectiveness for internal clump elimination.
The Stockfleth Move
Developed by competitive barista John Stockfleth. Sweep your finger in a spiral from the basket rim toward the center, redistributing the mound into a level bed.
Technique:
- Place finger at 3 o’clock position on basket rim
- Sweep inward in a spiral while rotating the portafilter counter-clockwise
- Complete 2-3 full rotations
- Surface should appear level
Limitations: Only addresses the top 2-3mm of grounds. Subsurface clumps remain intact. Finger compression creates minor density variations. Effective for surface leveling but not true distribution.
Best use case: Combine with WDT. Use WDT first to break clumps, then Stockfleth to level the surface. This gives you both internal distribution and a flat top.
Tapping Technique
Light taps settle grounds into a more uniform density. The vibration causes particles to shift into a lower-energy configuration.
Execution: Hold the portafilter 2-3cm above a solid surface. Release and let it tap once. Repeat 1-2 times maximum.
Physics: Tapping provides enough energy to overcome friction between particles, allowing them to settle into gaps. Excessive tapping creates bridging where particles lock into place with air pockets below, leading to channeling.
Critical limit: Never exceed 3 taps. Additional taps cause more harm than benefit. The grounds compact unevenly, creating horizontal stratification layers that trap water.
Never tap after tamping: Tapping a tamped puck breaks the seal between grounds and basket wall. Water will preferentially flow through this gap instead of the coffee, creating severe channeling.
Palm Distribution Method
Spin the basket in your palm while tapping the side with your finger. Centrifugal force spreads grounds outward toward the rim.
Technique:
- Hold portafilter in non-dominant hand
- Tap side of basket rim with dominant hand
- Rotate portafilter 90 degrees after each tap
- Repeat for 8-12 taps total
Results: Inconsistent. Works better with fresh, fluffy grounds. Fails with compacted or static-prone grounds. Better than nothing but far inferior to WDT.
Distribution Tools: Levelers and Spinners
Spring-loaded distribution tools (OCD, AutoComb) spin while sitting on top of the grounds, leveling the surface through mechanical scraping.
How they work: Adjustable depth fins rotate across the puck surface, cutting peaks and filling valleys. The goal is a flat, level top for even tamping.
Reality check: These tools level the surface effectively but don’t break up clumps below. They redistribute the mound but leave internal density variations intact. Think of them as automated Stockfleth moves.
Best practice: Use after WDT, not instead of it. WDT breaks clumps, then the leveler creates a perfectly flat surface for tamping. This combination gives you both internal distribution and surface levelness.
Cost consideration: Quality levelers run $40-80. For that price, you could buy a precision basket ($35) and WDT tool ($25) that provide greater extraction improvement.
Precision Baskets: Hardware That Forgives Distribution Errors
IMS and VST precision baskets feature laser-drilled holes in mathematically optimized patterns. Hole diameter varies by only ±0.02mm compared to ±0.15mm in standard baskets.
Impact on extraction: Uniform hole sizing creates even resistance across the entire basket floor. Water cannot preferentially flow through larger holes. This reduces the penalty for minor distribution imperfections.
Extraction yield improvement: Users with refractometers report 0.5-1.0% TDS increases when switching from standard to precision baskets while keeping all other variables constant. That translates to 2-4% higher extraction yield at the same grind setting.
Cost vs. benefit: IMS baskets cost $30-40. VST baskets run $35-45. For serious home baristas, this represents the highest ROI upgrade after a capable grinder. The improvement exceeds expensive tampers, distribution tools, or portafilter upgrades.
Sizing: Match your portafilter size exactly. The Breville Barista Express uses 54mm baskets. Commercial machines typically use 58mm. Measure your portafilter inner diameter if uncertain.
Basket depth: Ridged baskets allow doses from 15-22g depending on ridge height. Ridgeless (straight-walled) baskets provide maximum flexibility but require precise dosing to achieve optimal puck thickness.
Testing Your Distribution Quality
Measure the impact of improved distribution through quantitative and qualitative assessment.
Extraction Time Comparison
Baseline measurement: Pull a shot with your normal routine but skip WDT. Record:
- Time to first drips: ____ seconds
- Time to 36g output: ____ seconds
- Total extraction time: ____ seconds
WDT measurement: Pull an identical shot using WDT. Use the same beans, grind setting, dose, and tamp pressure. Record the same metrics.
Expected results: Proper WDT reduces extraction time by 2-4 seconds at the same grind setting. This occurs because eliminating clumps reduces flow resistance. The same water pressure extracts coffee more efficiently through a uniform bed.
Interpretation: If WDT increases extraction time, you over-worked the grounds or compacted them during distribution. Reduce stirring intensity and avoid pressing down with the needles.
Flow Rate Observation
Watch the extraction streams from your portafilter spouts (or use a bottomless portafilter for direct observation).
Poor distribution indicators:
- Flow starts from one side before the other
- Spurts or gushes that interrupt steady flow
- Thin, fast streams that indicate channeling
- Dry spots on the puck post-extraction
Good distribution indicators:
- Flow begins simultaneously across the entire puck surface
- Steady, consistent streams throughout extraction
- Uniform dark color from all areas
- Even saturation with no dry patches when you knock out the puck
Crema Stability Assessment
Proper extraction produces crema that persists for 60-90 seconds before dissipating.
Testing protocol:
- Pull shot into a pre-warmed cup
- Observe crema thickness (should be 3-4mm)
- Set timer when shot completes
- Note when crema breaks and liquid shows through
Crema indicators:
- <30 seconds: severe channeling or stale beans
- 30-60 seconds: minor channeling or distribution issues
- 60-90 seconds: good extraction and distribution
- 90 seconds: excellent extraction (or robusta content)
Crema texture: Tiger striping (brown striations through tan crema) indicates excellent extraction with balanced flow. Uniform light brown suggests fast, under-extracted flow. Dark brown with bitter taste signals over-extraction or channeling in localized areas.
Taste Profiling
The most important test is flavor. Proper distribution produces balanced sweetness and acidity without harsh edges.
Tasting grid: Rate each attribute 1-5:
- Acidity/Brightness: ____
- Sweetness: ____
- Bitterness: ____
- Body/Mouthfeel: ____
- Aftertaste: ____
- Overall Balance: ____
Distribution problems by taste:
- Sour + Bitter simultaneously: channeling creates under and over-extraction in the same shot
- Astringent dryness: over-extraction from compacted zones
- Thin, watery body: channeling robs extraction time
- Harsh acidity: under-extraction from fast channels
Target profile: Balanced shots show present but not dominant acidity, noticeable sweetness (caramel, chocolate, fruit depending on beans), low bitterness (should be pleasant backbone, not harsh), syrupy body that coats your tongue, and a clean, sweet aftertaste lasting 5-10 minutes.
Refractometer Measurement
For precise quantification, measure Total Dissolved Solids (TDS) and calculate extraction yield.
Equipment needed: VST LAB Coffee III or similar refractometer ($700+). Alternatively, use the free Brix measurement apps with phone camera ($0) for rough estimates.
Process:
- Pull shot into pre-weighed cup
- Weigh final beverage
- Stir thoroughly
- Place sample on refractometer
- Record TDS percentage
Calculation: Extraction Yield (%) = (Beverage Weight × TDS) ÷ Dose Weight × 100
Target ranges:
- TDS: 8-12% for straight espresso
- Extraction Yield: 18-22% (SCA “golden cup” standard)
Distribution impact: Poor distribution typically produces TDS values below 8% (under-extraction from channeling) or above 12% (over-extraction from compaction). Improved distribution centers your results in the 9-11% sweet spot.
Common Distribution Errors and Fixes
Over-Distribution
Symptom: Extraction time increases after implementing WDT. Shot tastes bitter and astringent despite using the same grind setting that previously worked.
Cause: Excessive stirring compacts grounds instead of fluffing them. The needles compress particles together through repeated passes in the same areas.
Fix: Reduce stirring to 2 passes maximum. Use lighter pressure. The needles should glide through grounds, not plow through resistance. If you feel significant resistance, your grounds are already well-distributed.
Incomplete Coverage
Symptom: Channeling persists after WDT implementation. Puck surface shows uneven saturation after extraction with dry spots remaining.
Cause: Missing the basket edges or center during distribution. The spiral pattern skipped areas or didn’t reach the basket bottom.
Fix: Use a systematic pattern every time. Start center, spiral outward, reverse direction, then specifically address edges with vertical needle passes. Consistency in technique matters more than intensity.
Wrong Tool Diameter
Symptom: WDT takes excessive time and still leaves clumps. Grounds look compressed rather than fluffy.
Cause: Needles thicker than 0.5mm compress grounds as they pass through. You’re creating density variations instead of eliminating them.
Fix: Switch to thinner needles. Acupuncture needles in 0.3-0.4mm diameter work perfectly. If unavailable, straightened paperclips (approximately 0.4mm) work better than thick tools.
Dosing Funnel Issues
Symptom: Grounds spill during distribution. The WDT tool catches on the funnel rim.
Cause: Funnel too shallow for your dose size or WDT tool diameter.
Fix: Use a taller funnel that provides 15-20mm clearance above the grounds mound. Magnetic funnels stay secure during stirring. Remove the funnel before tamping.
Post-Tamping Distribution
Symptom: You used WDT after tamping and the shot channeled severely with gushing flow.
Cause: Disturbing a tamped puck breaks the seal between grounds and basket wall. Water flows through this gap preferentially.
Fix: Never touch grounds after tamping. The sequence must be: dose → WDT → level → tamp → lock → extract. Any deviation creates problems.
Integration Into Your Workflow
Effective distribution adds 8-12 seconds to your shot preparation time. This investment pays off in consistency and flavor clarity.
Morning routine optimization:
- Warm machine (30-45 seconds with flush)
- Weigh beans (18.0g on scale)
- Grind into portafilter with funnel
- WDT (10 seconds, systematic pattern)
- Remove funnel
- Level surface (2 seconds, finger sweep)
- Tamp (3 seconds, firm and level)
- Lock and extract immediately
Total added time vs. no distribution: Approximately 12 seconds. The consistency improvement and taste quality justify this minor extension.
Workflow tip: Prepare your WDT tool while the machine warms. Have it ready next to the grinder so distribution happens immediately after dosing. This prevents grounds from settling and clumping while you search for tools.
Advanced Distribution for Light Roasts
Light roasts present unique distribution challenges. Their density and hardness create smaller, more numerous clumps that resist basic WDT.
Light roast characteristics:
- Higher particle density
- More static due to lower oil content
- Smaller, harder clumps
- Requires finer grinding for proper extraction
Modified WDT technique:
- Increase needle count to 12-15 for better coverage
- Add third stirring pass focusing on subsurface clumps
- Use RDT (Ross Droplet) to reduce static before grinding
- Consider dosing 0.5g higher to compensate for density
Grind adjustment: Light roasts may need settings 2-3 steps finer than medium roasts. The Breville Barista Express often bottoms out before achieving ideal particle size for dense Nordic-style coffees. If setting 1 still extracts too fast, consider upgrading to a grinder with wider range like the Baratza Sette 270 or Niche Zero.
Temperature Interaction With Distribution
Water temperature affects extraction differently in well-distributed versus poorly-distributed pucks.
Channeled pucks: Fast water flow through channels doesn’t allow sufficient time for thermal equilibrium. The shot extracts cooler than your PID setting, resulting in under-extraction even at high temperatures (205-210°F).
Well-distributed pucks: Uniform flow allows proper thermal exchange. Your PID temperature directly controls extraction character. You can fine-tune flavor by adjusting temperature in 2-3°F increments.
Temperature recommendations by distribution quality:
- Poor distribution: higher temps (205-210°F) compensate for fast flow
- Good distribution: standard temps (198-203°F) for balanced extraction
- Excellent distribution: lower temps (195-200°F) avoid over-extraction
The Breville Barista Express offers three temperature settings accessed by holding the Program button during startup: 190°F for light roasts, 200°F for standard use, and 210°F for dark roasts. These presets assume mediocre distribution. With excellent WDT technique, you can decrease one setting level and achieve better balance.
Distribution and Pressure Profiling
Pre-infusion benefits significantly from good distribution. The low-pressure wetting phase saturates grounds evenly when clumps are absent.
Standard machines: The Breville Barista Express includes basic pre-infusion that ramps from 0 to 7-8 bar over 3 seconds. This gentle start reduces channeling by 30% compared to immediate full pressure.
Distribution impact on pre-infusion: Well-distributed grounds absorb water uniformly during pre-infusion, creating even resistance across the puck. Poor distribution causes dry spots that resist wetting, creating permanent channels when full pressure arrives.
Advanced machines: Lever machines and pressure-profiling pumps allow manual control of pressure throughout extraction. These systems magnify distribution quality differences. Perfect distribution enables declining-pressure profiles that extract delicate flavors impossible with channeling.
Tools and Accessories Worth Buying
Essential ($0-25)
WDT tool: Priority one. 3D-print design files available free online. Acupuncture needles from medical supply: $5 for 100-pack. Cork and glue: $2. Total DIY cost: $7.
Dosing funnel: Magnetic collar for 54mm: $12-15. 58mm aluminum funnel: $15-20. Prevents spillage and enables clean WDT.
Scale: 0.1g precision required. Generic jewelry scale: $15. Hario V60 scale: $25. Acaia Lunar: $250 (overkill for most users).
Helpful ($25-75)
Precision basket: IMS or VST 18-22g ridgeless basket: $35-45. Improves extraction yield 2-4% compared to stock baskets.
Puck screen: Stainless mesh sits on grounds during extraction: $8-15. Keeps shower screen cleaner and improves top-surface distribution slightly. Not essential but reduces maintenance.
Bottomless portafilter: Visual feedback on channeling: $45-60 for 54mm, $35-50 for 58mm. Educational tool that accelerates learning. Strong recommendation for anyone serious about technique improvement.
Optional ($75+)
Distribution tool: Spring-loaded leveler: $40-80. Levels surface after WDT. Nice to have but not necessary if you master finger-leveling.
Calibrated tamper: 30-pound spring mechanism: $60-90. Ensures consistent compression. Standard tamper works fine if you develop consistent technique.
Refractometer: VST LAB Coffee: $700. For data-driven optimization. Only worthwhile if you enjoy measurement and experimentation.
Maintenance: Keeping Your Distribution Game Strong
Weekly:
- Clean WDT needles with brush or damp cloth
- Wipe portafilter basket with dry cloth
- Brush out grinder burr chamber
Monthly:
- Deep clean grinder with vacuum and brush
- Soak portafilter basket in Cafiza solution
- Inspect WDT needles for bending or damage
Quarterly:
- Replace WDT needles if bent
- Check dosing funnel for cracks or magnetic degradation
- Verify basket isn’t developing pitting or corrosion
Signs your tools need replacement:
- Bent needles compress rather than separate grounds
- Funnel sits loose or wobbles on portafilter
- Basket shows visible corrosion or deformation
- Basket holes show coffee buildup that won’t clean
Conclusion: Distribution as Foundation
Master distribution before adjusting grind, dose, or temperature. An evenly distributed puck extracts predictably. A channeled puck produces random results no matter what other variables you control.
The sequence for skill building:
- Consistent distribution (WDT technique)
- Consistent dosing (weigh every shot)
- Consistent tamping (level pressure)
- Grind adjustment (dial in extraction time)
- Temperature tuning (fine-tune flavor profile)
Attempting steps 4-5 without mastering 1-3 creates frustration. Your shots vary wildly because you’re changing grind settings to compensate for inconsistent distribution. Lock in solid distribution technique first. Then the other variables become meaningful and adjustable.